0021 MPSAI EN:修订间差异
无编辑摘要 |
|||
| (未显示同一用户的4个中间版本) | |||
| 第1行: | 第1行: | ||
[[0021 MPSAI|切换语言为中文]] | |||
== ''' | == '''Keywords''' == | ||
Raspberry Pi 5, PCIe, Driver installation, Operation demonstration, 2230, 2242, 2280, NVMe SSD, SSD X1, AI, HAILO 8L, Camera, OV5647, Image Recognition, Optional auxiliary power supply | |||
== ''' | == '''I. Introduction''' == | ||
== '''II. Hardware Resources''' == | |||
1. Designed for the Raspberry Pi 5, it uses a 16-pin FPC to connect to the Raspberry Pi 5's PCIe interface. | |||
2. The MPSTPU expansion board adds two PCIe interfaces via a PCIe Switch. | |||
3. One PCIe extension M.2 E key interface, 2242 size, used for connecting the AI module HAilo8,with the official Raspberry Pi OS loading the driver. | |||
4. One PCIe expanded M.2 M key slot, for connecting NVMe SSD (PCIe X1, Gen2 mode only). Supports 2230/2242/2280 size SSDs (defaulting to welded mounting posts for 2280 size). It does not support SSDs that use NGFF and SATA protocols. | |||
5. The SSD can be used for data storage and system booting. When booting from the SSD, the Raspberry Pi official firmware needs to be version 2024.5.13 or later. | |||
6. The 40-pin GPIO section adopts an unobstructed design on the top. It can be connected via DuPont cable, without affecting the use of the Raspberry Pi 5's own GPIO pins. | |||
7. Gold immersion PCB process, lead-free production, certified by UL, compliant with ROHS standards, and has a fire rating of 94V-0. | |||
9. | 8. It uses four M2.5 mounting holes that align with the Raspberry Pi 5 mounting holes. | ||
9. It is compatible with an optional aluminum alloy enclosure. | |||
http://www.mcuzone.com/wiki/0021_MPSAI/0021_MPSAI_01.jpg | http://www.mcuzone.com/wiki/0021_MPSAI/0021_MPSAI_01.jpg | ||
== ''' | == '''III. System flashing and setting''' == | ||
=== 3.1 | === 3.1 Overview === | ||
This document uses the Raspberry Pi OS, Ubuntu system and OpenWrt system for testing. | |||
The version of the Raspberry Pi OS is: 2024-07-04-raspios-bookworm-arm64.img.xz | |||
You can download the Raspberry Pi OS in: | |||
https://www.raspberrypi.com/software/operating-systems/#raspberry-pi-os-64-bit | https://www.raspberrypi.com/software/operating-systems/#raspberry-pi-os-64-bit | ||
The version of the Ubuntu system is: ubuntu-24.04-preinstalled-desktop-arm64+raspi.img.xz | |||
You can download the Ubuntu system in: | |||
https://ubuntu.com/download/raspberry-pi | https://ubuntu.com/download/raspberry-pi | ||
The version of the OpenWrt system is: openwrt-bcm27xx-bcm2712-rpi-5-squashfs-sysupgrade-linux-6.1.100-20240805.img.gz | |||
=== 3.2 System flashed onto the SD (TF) card === | |||
[[0005 MPS2242 2280 2280P(Single SSD Expansion Board)#3.2 Boot from TF card|Click here to read the instructions for System flashing]] | |||
=== 3.2 | |||
[[0005 MPS2242 2280 | |||
=== 3.3 系统烧写在SSD硬盘上 === | === 3.3 系统烧写在SSD硬盘上 === | ||
[[0005 MPS2242 2280 | [[0005 MPS2242 2280 2280P(Single SSD Expansion Board)#3.3 Boot from SSD|Click here to read the instructions for System flashing]] | ||
== ''' | == '''IV. AI (HAILO 8L) usage Demonstration on the Raspberry Pi OS''' == | ||
=== 4.1 | === 4.1 Overview === | ||
In various practical applications, the demand for camera image detection and recognition is gradually increasing, and there are many AI-based solutions available on the market. The solution demonstrated in this article involves the OV5647 camera, the MPSAI, and the HAILO 8L AI module paired with the Raspberry Pi 5. | In various practical applications, the demand for camera image detection and recognition is gradually increasing, and there are many AI-based solutions available on the market. The solution demonstrated in this article involves the OV5647 camera, the MPSAI, and the HAILO 8L AI module paired with the Raspberry Pi 5. | ||
| 第71行: | 第75行: | ||
http://www.mcuzone.com/wiki/0005_MPS2242_2280/0005_MPS2242_2280_29.jpg | http://www.mcuzone.com/wiki/0005_MPS2242_2280/0005_MPS2242_2280_29.jpg | ||
4.2.2 | 4.2.2 Run <code>sudo rpi-eeprom-update</code>to check the Raspberry Pi firmware and ensure that the firmware date is after December 6, 2023: | ||
http://www.mcuzone.com/wiki/0005_MPS2242_2280/0005_MPS2242_2280_30.jpg | http://www.mcuzone.com/wiki/0005_MPS2242_2280/0005_MPS2242_2280_30.jpg | ||
As shown in the above figure, the firmware date is June 5, 2024. | |||
4.2.3 | 4.2.3 Run <code>sudo raspi-config</code> ,select the corresponding options in sequence according to the following diagram: | ||
http://www.mcuzone.com/wiki/0005_MPS2242_2280/0005_MPS2242_2280_31.jpg | http://www.mcuzone.com/wiki/0005_MPS2242_2280/0005_MPS2242_2280_31.jpg | ||
| 第91行: | 第95行: | ||
http://www.mcuzone.com/wiki/0005_MPS2242_2280/0005_MPS2242_2280_36.jpg | http://www.mcuzone.com/wiki/0005_MPS2242_2280/0005_MPS2242_2280_36.jpg | ||
After making your selection and exiting, the system will automatically restart. If it does not restart automatically, please manually execute <code>sudo reboot</code> to restart the system. | |||
=== 4.3 | === 4.3 Install the depends required for the AI module === | ||
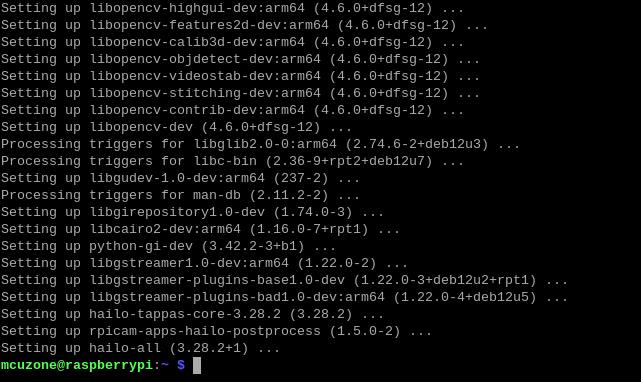
Run <code>sudo apt install hailo-all</code>, install the depends required for the AI module: | |||
http://www.mcuzone.com/wiki/0005_MPS2242_2280/0005_MPS2242_2280_37.jpg | http://www.mcuzone.com/wiki/0005_MPS2242_2280/0005_MPS2242_2280_37.jpg | ||
| 第100行: | 第104行: | ||
http://www.mcuzone.com/wiki/0005_MPS2242_2280/0005_MPS2242_2280_38.jpg | http://www.mcuzone.com/wiki/0005_MPS2242_2280/0005_MPS2242_2280_38.jpg | ||
After completing this, execute <code>sudo reboot</code> to restart the system and apply these settings. | |||
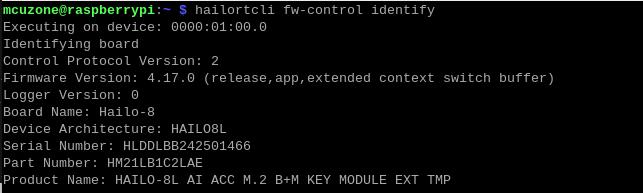
Run <code>hailortcli fw-control identify</code>, If the following output appears, it indicates that the depends for HAILO 8L have been successfully installed: | |||
http://www.mcuzone.com/wiki/0005_MPS2242_2280/0005_MPS2242_2280_39.jpg | http://www.mcuzone.com/wiki/0005_MPS2242_2280/0005_MPS2242_2280_39.jpg | ||
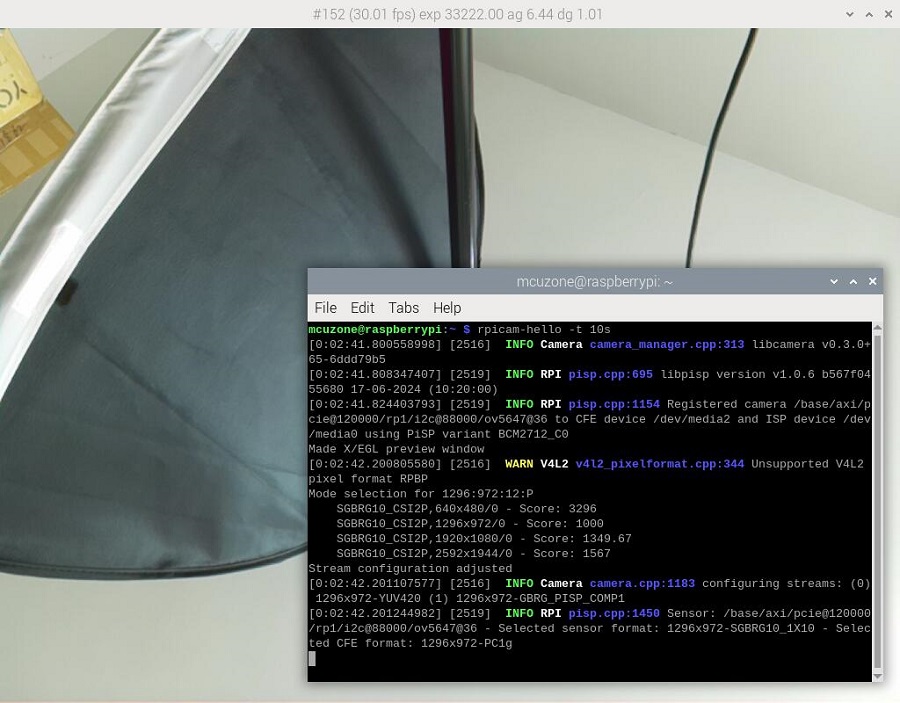
Finally, execute <code>rpicam-hello -t 10s</code> to turn on the camera and bring up the preview window, ensuring that the camera is functioning normally. | |||
http://www.mcuzone.com/wiki/0005_MPS2242_2280/0005_MPS2242_2280_40.jpg | http://www.mcuzone.com/wiki/0005_MPS2242_2280/0005_MPS2242_2280_40.jpg | ||
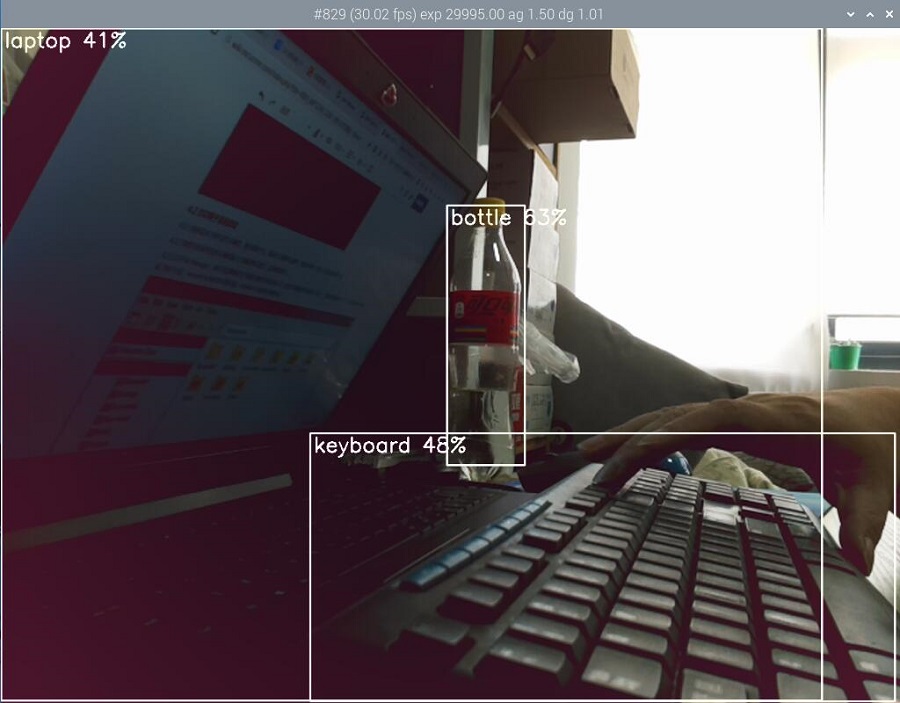
=== 4.4 | === 4.4 Image recognition and detection === | ||
Run: | |||
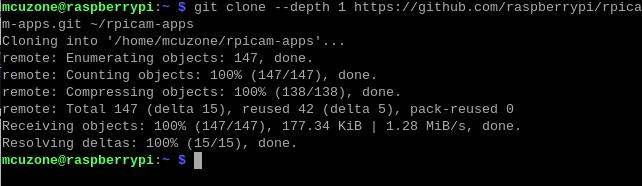
<code>git clone --depth 1 <nowiki>https://github.com/raspberrypi/rpicam-apps.git</nowiki> ~/rpicam-apps</code> | <code>git clone --depth 1 <nowiki>https://github.com/raspberrypi/rpicam-apps.git</nowiki> ~/rpicam-apps</code> | ||
Clone the library of rpicam-apps: | |||
http://www.mcuzone.com/wiki/0005_MPS2242_2280/0005_MPS2242_2280_41.jpg | http://www.mcuzone.com/wiki/0005_MPS2242_2280/0005_MPS2242_2280_41.jpg | ||
After cloning is completed, you can begin image recognition and detection: | |||
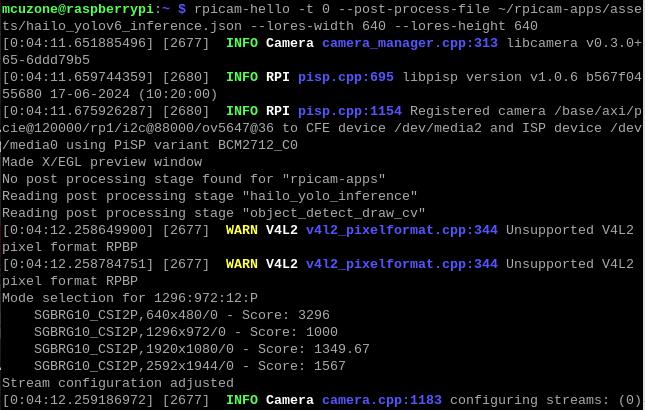
<code>rpicam-hello -t 0 --post-process-file ~/rpicam-apps/assets/hailo_yolov6_inference.json --lores-width 640 --lores-height 640</code> | <code>rpicam-hello -t 0 --post-process-file ~/rpicam-apps/assets/hailo_yolov6_inference.json --lores-width 640 --lores-height 640</code> | ||
| 第127行: | 第131行: | ||
http://www.mcuzone.com/wiki/0005_MPS2242_2280/0005_MPS2242_2280_43.jpg | http://www.mcuzone.com/wiki/0005_MPS2242_2280/0005_MPS2242_2280_43.jpg | ||
'''<big> | '''<big>You should downloading a large amount of data from the internet out of China to use the testing of this development board, so users can contact our company after buying this development board to obtain a pre-configured Raspberry Pi OS image.</big>''' | ||
== ''' | == '''V. Using SSD in the Raspberry Pi OS''' == | ||
For basic operations on the SSD, we can refer to the following link: | |||
[[0005 MPS2242 2280 | [[0005 MPS2242 2280 2280P(Single SSD Expansion Board)#4.1 Use the SSD for storage expansion|Use the SSD for storage expansion (Raspberry Pi OS)]] | ||
[[0005 MPS2242 2280 | [[0005 MPS2242 2280 2280P(Single SSD Expansion Board)#VI. Perform partitioning and other operations on the SSD|Perform partitioning and other operations on the SSD]] | ||
[[0005 MPS2242 2280 | [[0005 MPS2242 2280 2280P(Single SSD Expansion Board)#cite ref-1|Adjust the peripheral boot order]] | ||
[[0005 MPS2242 2280 | [[0005 MPS2242 2280 2280P(Single SSD Expansion Board)#7.2 Test the SSD speed in PCIe Gen2 mode|Install the SSD speed testing software hdparm]] | ||
For how to test the SSD, we can refer to the following link: | |||
[[0008 MPS2.5G(SSD和2.5G以太网)#4.2 SSD硬盘测试|SSD硬盘测试(树莓派OS下)]] | [[0008 MPS2.5G(SSD和2.5G以太网)#4.2 SSD硬盘测试|SSD硬盘测试(树莓派OS下)]] | ||
== ''' | == '''VI. Using SSD in the Ubuntu system''' == | ||
For basic operations on the SSD, we can refer to the following link, apart from the SSD being used for storage expansion, which operates slightly differently under Raspberry Pi OS, the rest is basically the same. | |||
[[0005 MPS2242 2280 | [[0005 MPS2242 2280 2280P(Single SSD Expansion Board)#5.1 Use the SSD for storage expansion|Use the SSD for storage expansion(Ubuntu system)]] | ||
[[0005 MPS2242 2280 | [[0005 MPS2242 2280 2280P(Single SSD Expansion Board)#VI. Perform partitioning and other operations on the SSD|Perform partitioning and other operations on the SSD]] | ||
[[0005 MPS2242 2280 | [[0005 MPS2242 2280 2280P(Single SSD Expansion Board)#cite ref-1|Adjust the peripheral boot order]] | ||
[[0005 MPS2242 2280 | [[0005 MPS2242 2280 2280P(Single SSD Expansion Board)#7.2 Test the SSD speed in PCIe Gen2 mode|Install the SSD speed testing software hdparm]] | ||
For how to test the SSD, we can refer to the following link: | |||
[[0008 MPS2.5G(SSD和2.5G以太网)#5.2 SSD硬盘测试|SSD硬盘测试(Ubuntu系统下)]] | [[0008 MPS2.5G(SSD和2.5G以太网)#5.2 SSD硬盘测试|SSD硬盘测试(Ubuntu系统下)]] | ||
== ''' | == '''VII. Using SSD in the OpenWrt system''' == | ||
For how to use the SSD in the OpenWrt system, we can refer to the following link: | |||
[[2001 CM4 Ultra(CM4核心板的扩展板)#5.5 SSD硬盘测试|SSD硬盘测试(OpenWrt系统下)]] | [[2001 CM4 Ultra(CM4核心板的扩展板)#5.5 SSD硬盘测试|SSD硬盘测试(OpenWrt系统下)]] | ||
{{ | {{Contact_Us_icon}} | ||
[http://wiki.mcuzone.com/index.php?title=0021_MPSAI_EN T] | |||
2024年12月18日 (三) 13:35的最新版本
Keywords
Raspberry Pi 5, PCIe, Driver installation, Operation demonstration, 2230, 2242, 2280, NVMe SSD, SSD X1, AI, HAILO 8L, Camera, OV5647, Image Recognition, Optional auxiliary power supply
I. Introduction
II. Hardware Resources
1. Designed for the Raspberry Pi 5, it uses a 16-pin FPC to connect to the Raspberry Pi 5's PCIe interface.
2. The MPSTPU expansion board adds two PCIe interfaces via a PCIe Switch.
3. One PCIe extension M.2 E key interface, 2242 size, used for connecting the AI module HAilo8,with the official Raspberry Pi OS loading the driver.
4. One PCIe expanded M.2 M key slot, for connecting NVMe SSD (PCIe X1, Gen2 mode only). Supports 2230/2242/2280 size SSDs (defaulting to welded mounting posts for 2280 size). It does not support SSDs that use NGFF and SATA protocols.
5. The SSD can be used for data storage and system booting. When booting from the SSD, the Raspberry Pi official firmware needs to be version 2024.5.13 or later.
6. The 40-pin GPIO section adopts an unobstructed design on the top. It can be connected via DuPont cable, without affecting the use of the Raspberry Pi 5's own GPIO pins.
7. Gold immersion PCB process, lead-free production, certified by UL, compliant with ROHS standards, and has a fire rating of 94V-0.
8. It uses four M2.5 mounting holes that align with the Raspberry Pi 5 mounting holes.
9. It is compatible with an optional aluminum alloy enclosure.

III. System flashing and setting
3.1 Overview
This document uses the Raspberry Pi OS, Ubuntu system and OpenWrt system for testing.
The version of the Raspberry Pi OS is: 2024-07-04-raspios-bookworm-arm64.img.xz
You can download the Raspberry Pi OS in:
https://www.raspberrypi.com/software/operating-systems/#raspberry-pi-os-64-bit
The version of the Ubuntu system is: ubuntu-24.04-preinstalled-desktop-arm64+raspi.img.xz
You can download the Ubuntu system in:
https://ubuntu.com/download/raspberry-pi
The version of the OpenWrt system is: openwrt-bcm27xx-bcm2712-rpi-5-squashfs-sysupgrade-linux-6.1.100-20240805.img.gz
3.2 System flashed onto the SD (TF) card
Click here to read the instructions for System flashing
3.3 系统烧写在SSD硬盘上
Click here to read the instructions for System flashing
IV. AI (HAILO 8L) usage Demonstration on the Raspberry Pi OS
4.1 Overview
In various practical applications, the demand for camera image detection and recognition is gradually increasing, and there are many AI-based solutions available on the market. The solution demonstrated in this article involves the OV5647 camera, the MPSAI, and the HAILO 8L AI module paired with the Raspberry Pi 5.

Note: The operation requires a stable internet connection to the regions out of China (you may need to find your own method). Otherwise, many files may not download or may only partially download, which could ultimately lead to the code failing to run.
4.2 Update system
Note: The following operational steps apply whether the system is booted from a TF card or an SSD.
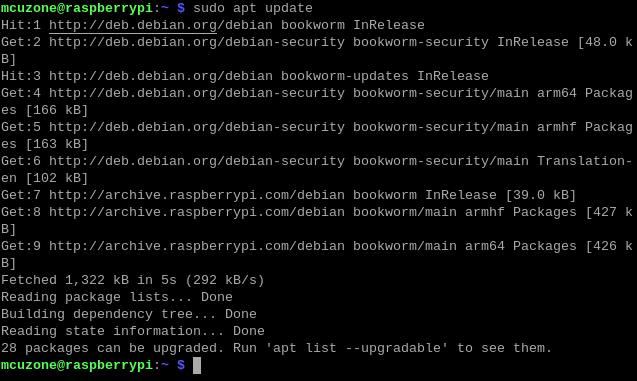
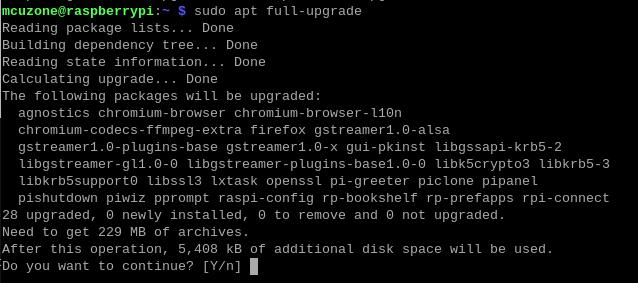
4.2.1 Boot the Raspberry Pi OS and run commands in the terminal:
sudo apt update
sudo apt full-upgrade
4.2.2 Run sudo rpi-eeprom-updateto check the Raspberry Pi firmware and ensure that the firmware date is after December 6, 2023:

As shown in the above figure, the firmware date is June 5, 2024.
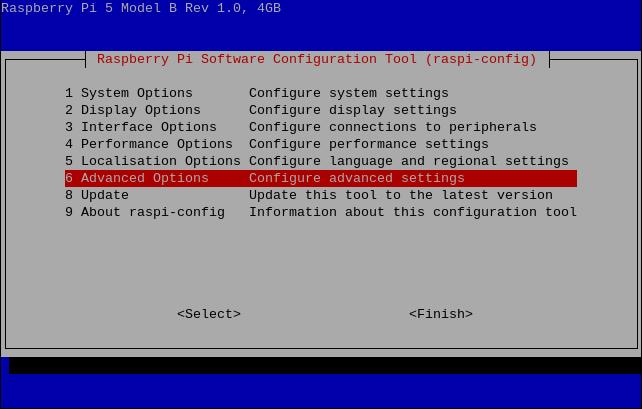
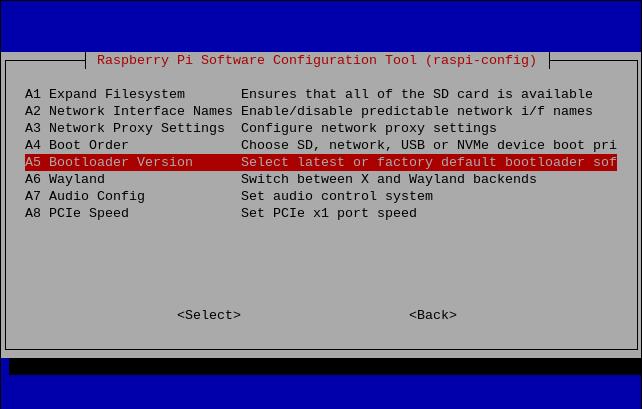
4.2.3 Run sudo raspi-config ,select the corresponding options in sequence according to the following diagram:

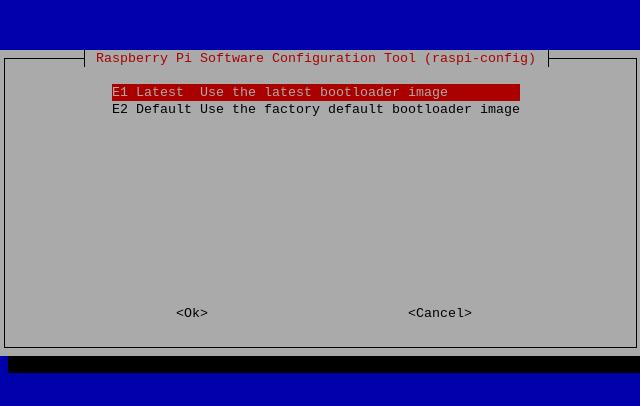
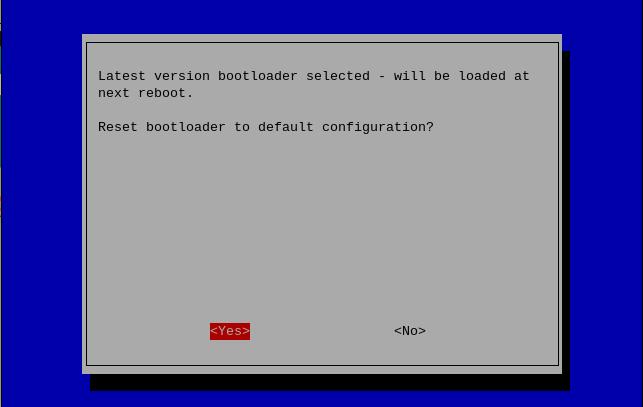
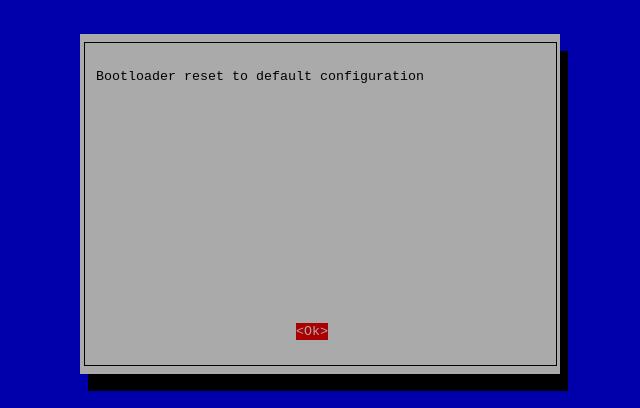
After making your selection and exiting, the system will automatically restart. If it does not restart automatically, please manually execute sudo reboot to restart the system.
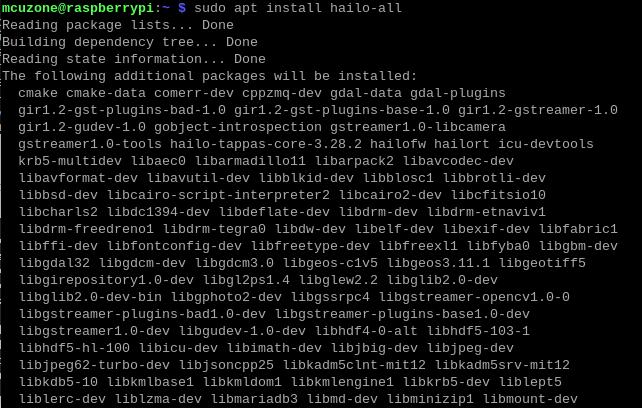
4.3 Install the depends required for the AI module
Run sudo apt install hailo-all, install the depends required for the AI module:
After completing this, execute sudo reboot to restart the system and apply these settings.
Run hailortcli fw-control identify, If the following output appears, it indicates that the depends for HAILO 8L have been successfully installed:
Finally, execute rpicam-hello -t 10s to turn on the camera and bring up the preview window, ensuring that the camera is functioning normally.
4.4 Image recognition and detection
Run:
git clone --depth 1 https://github.com/raspberrypi/rpicam-apps.git ~/rpicam-apps
Clone the library of rpicam-apps:
After cloning is completed, you can begin image recognition and detection:
rpicam-hello -t 0 --post-process-file ~/rpicam-apps/assets/hailo_yolov6_inference.json --lores-width 640 --lores-height 640
You should downloading a large amount of data from the internet out of China to use the testing of this development board, so users can contact our company after buying this development board to obtain a pre-configured Raspberry Pi OS image.
V. Using SSD in the Raspberry Pi OS
For basic operations on the SSD, we can refer to the following link:
Use the SSD for storage expansion (Raspberry Pi OS)
Perform partitioning and other operations on the SSD
Adjust the peripheral boot order
Install the SSD speed testing software hdparm
For how to test the SSD, we can refer to the following link:
VI. Using SSD in the Ubuntu system
For basic operations on the SSD, we can refer to the following link, apart from the SSD being used for storage expansion, which operates slightly differently under Raspberry Pi OS, the rest is basically the same.
Use the SSD for storage expansion(Ubuntu system)
Perform partitioning and other operations on the SSD
Adjust the peripheral boot order
Install the SSD speed testing software hdparm
For how to test the SSD, we can refer to the following link:
VII. Using SSD in the OpenWrt system
For how to use the SSD in the OpenWrt system, we can refer to the following link:
Contact Us


 QQ:8204136
Email: mcuzone@vip.qq.com
Tel: +86(0)13957118045
If there are any omissions, errors, or infringements on this page, please contact us through the above methods. Thank you!
Copyright 2004-2025 Wildchip