0023 MP2.5GTPU(M.2 E) EN
Keywords
Raspberry Pi5, PCIe, Switch, RL8125, 2.5Gbps, Ethernet, iperf3 speed test, TPU, DTPU, Driver installation, Operation demonstration, AI, google, Coral, M.2 E key
I. Introduction
The Raspberry Pi 5 features a 16-pin PCIe interface, which we can use to expand a variety of peripheral devices. Now we utilize the PCIe interface, with one is an M.2 E key interface, which can connect to a TPU module with A+E Key. Another expands the Ethernet capability through the RTL8125 chip to 2.5Gbps. The 2.5G Ethernet on this expansion board is automatically recognized as eth1 in the Raspberry Pi OS without requiring any drivers upon power-up. If using the Ubuntu system, you need to install the RTL8125 driver first before it can be used. The Coral M.2 Accelerator is an M.2 sized module that can expand edge TPU coprocessing capabilities via the PCIE interface for platforms such as the Raspberry Pi.
II. Hardware Resources
1. Use a 0.5mm 16-pin PCIe cable to connect to the PCIE interface of the Raspberry Pi 5.
2. One PCIe expansion for 2.5Gbps Ethernet.
3. One PCIe expansion for M.2 E-key interface, it used to connect to Google Coral Edge TPU, with the Raspberry Pi official OS loading the driver.
4. The 2.5Gbps Ethernet is driver-free in the Raspberry Pi OS and OpenWrt system, but requires driver installation in Ubuntu system.
5. Gold immersion PCB process, lead-free production, certified by UL, compliant with ROHS standards, and has a fire rating of 94V-0.
6. The board has four M2.5 mounting holes, with a recessed design on the top of the board to facilitate the use of the 40-Pin GPIO.

III. System flashing and setting
3.1 Overview
This document uses the Raspberry Pi OS, Ubuntu system and OpenWrt system for testing.
The version of the Raspberry Pi OS is: 2024-07-04-raspios-bookworm-arm64.img.xz
You can download the Raspberry Pi OS in:
https://www.raspberrypi.com/software/operating-systems/#raspberry-pi-os-64-bit
Note: If you want to run the TPU module under Raspberry Pi OS, the TF card used for flashing the system should have a space of at least 16GB, otherwise, it will display space errors during the installation and configuration process!
The version of the Ubuntu system is: ubuntu-24.04-preinstalled-desktop-arm64+raspi.img.xz
You can download the Ubuntu system in:
https://ubuntu.com/download/raspberry-pi
The version of the OpenWrt system is: openwrt-bcm27xx-bcm2712-rpi-5-squashfs-sysupgrade-linux-6.1.100-20240805.img.gz
3.2 System flashed onto the SD (TF) card
Click here to read the instructions for System flashing
IV. Raspberry Pi OS operation demonstration
4.1 Internet test
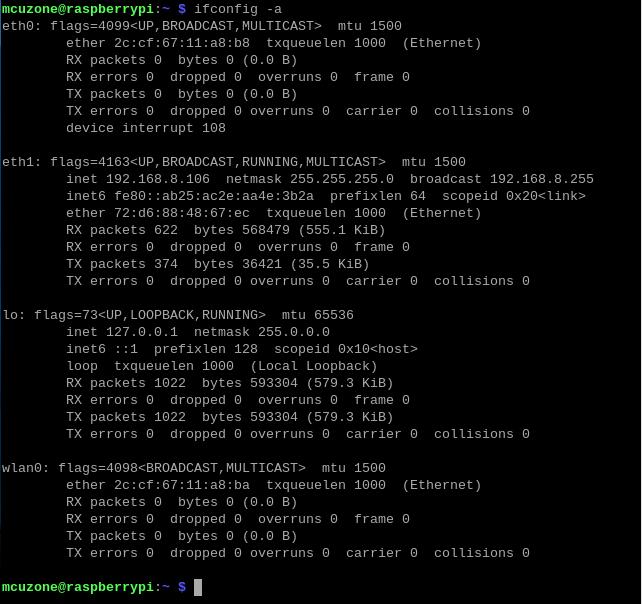
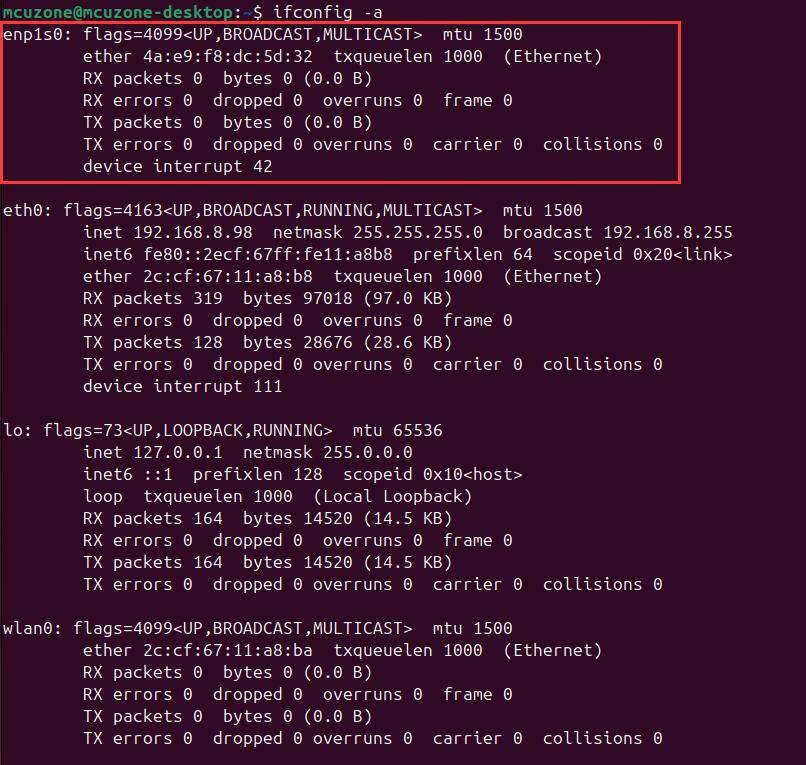
The 2.5G Ethernet on the MP2.5GTPU expansion board is plug-and-play without requiring drivers in the Raspberry Pi OS. After the system starts, enter the command ifconfig -a in the terminal, and the 2.5G Ethernet will be recognized as eth1:
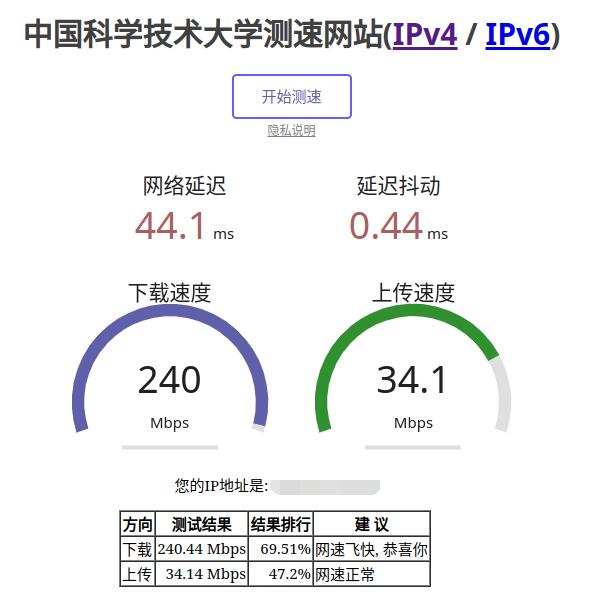
Using the speed test website of USTC, we conducted a speed test for the 2.5G Ethernet connected to the internet (with a 200M connection), and the results are as follows:
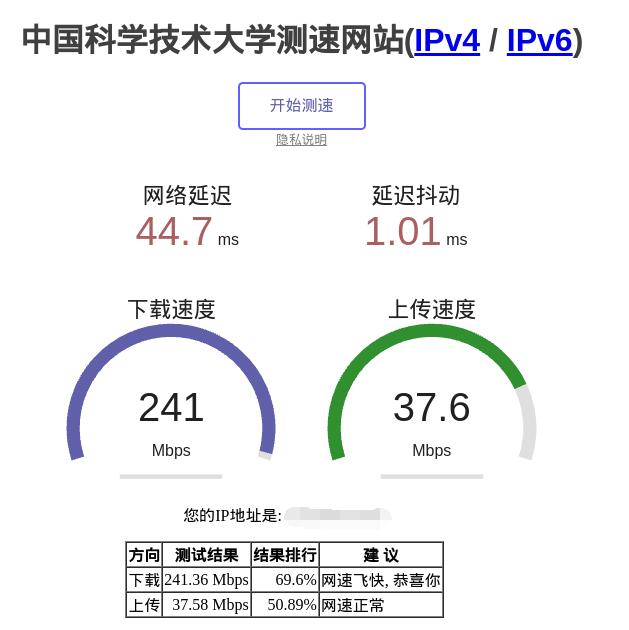
Note: The speed test can be affected by the network environment and the testing method. Speeds should be considered based on actual results; this test is for reference only.
4.2 2.5G Ethernet test in local network
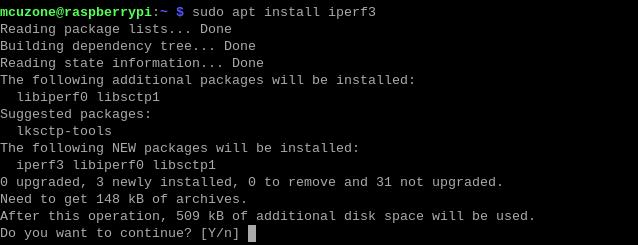
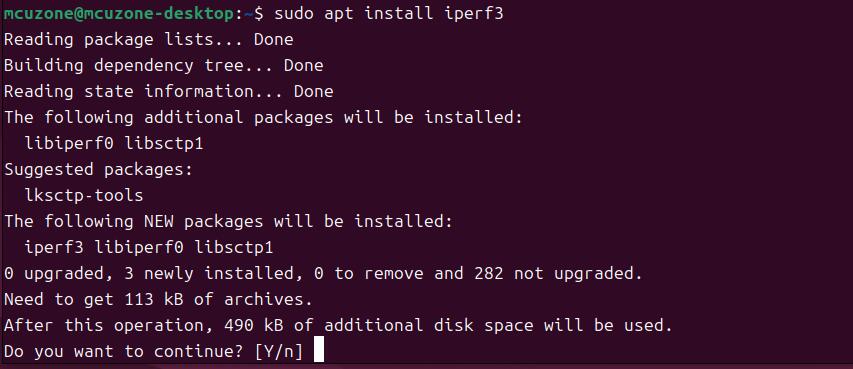
Install the network speed testing tool iperf3:
sudo apt install iperf3
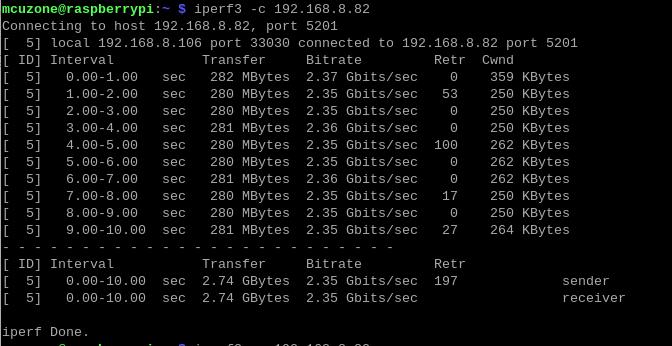
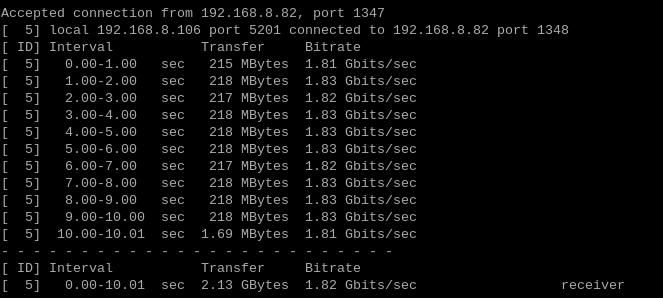
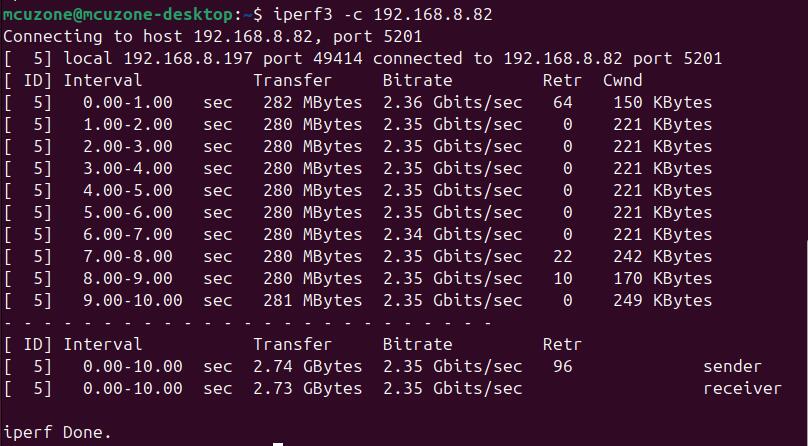
Use iperf3 to perform a speed test between the Raspberry Pi OS and the PC via a 2.5G router.
The speed test results for eth1 are as follows:
When the Raspberry Pi OS acts as the client, the speed is about 2.35 Gbps:
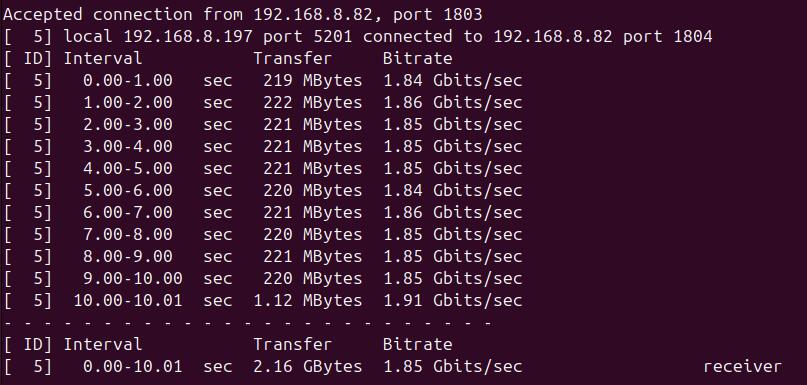
When the Raspberry Pi OS acts as the server, the speed is about 1.82 Gbps:
Note: The speed test can be affected by the network environment and the testing method. Speeds should be considered based on actual results; this test is for reference only.
4.3 Fix the MAC address of the 2.5G Ethernet port
The 2.5G Ethernet port uses the RTL8125 network card, and during use, the MAC address is not fixed. Each time the device is powered on again, the MAC address changes randomly. The following explains how to set a fixed MAC address for the RTL8125 network card.
This explanation also applies to the Ubuntu system.
First, check the identification information of the RTL8125 network card in terminal:
ipconfig -a
Here, the RTL8125 network card is identified as eth1, but in practice, the name recognized by the system might be different.
Then input:
sudo mousepad /etc/systemd/system/macspoof@eth1.service
Or:
sudo nano /etc/systemd/system/macspoof@eth1.service
eth1 is the name recognized by the system for the network card shown above.
Executing the above command will create a new document, then enter the following text:
[Unit]
Description=MAC Address Change %I
Wants=network-pre.target
Before=network-pre.target
BindsTo=sys-subsystem-net-devices-%i.device
After=sys-subsystem-net-devices-%i.device
[Service]
Type=oneshot
ExecStart=/usr/bin/ip link set dev %i address xx:xx:xx:xx:xx:xx
ExecStart=/usr/bin/ip link set dev %i up
[Install]
WantedBy=multi-user.target
Here, "xx:xx:xx:xx:xx:xx" represents the MAC address you wish to assign. You can determine it according to the MAC address format (make sure it does not duplicate the MAC address of other network devices). After setting it, save and exit.
Then execute the following command to enable the service:
sudo systemctl enable macspoof@eth1.service
This completes the fixation of the MAC address for eth1.
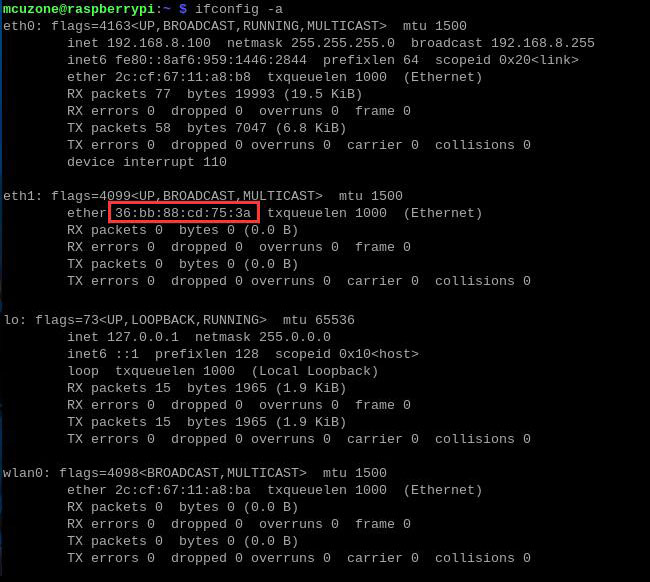
After completing all operations, restart the system. Once the system has finished rebooting, execute ipconfig -a to see that the MAC address has been successfully changed.
V. Ubuntu system operation demonstration
5.1 Install the RTL8125 driver for Ubuntu system
The 2.5G Ethernet on the MP2.5GTPU expansion board is not plug-and-play in Ubuntu systems and requires the installation of the RTL8125 driver.
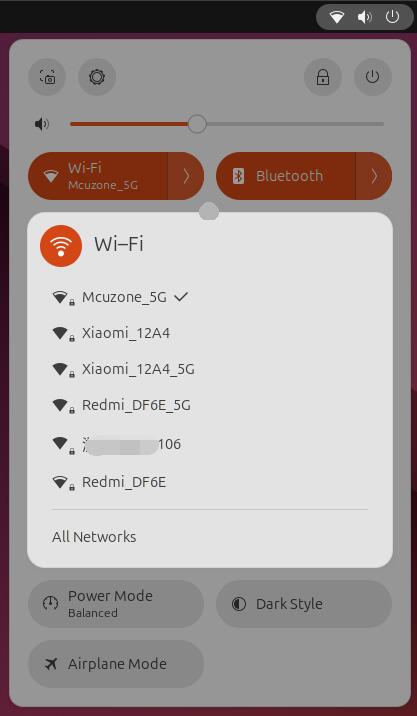
Since the wireless network module of the Raspberry Pi 5 is plug-and-play in Ubuntu systems, we need to use it to connect to a wireless network.
We can also use an Ethernet cable to connect to the native Ethernet port on the Raspberry Pi 5.
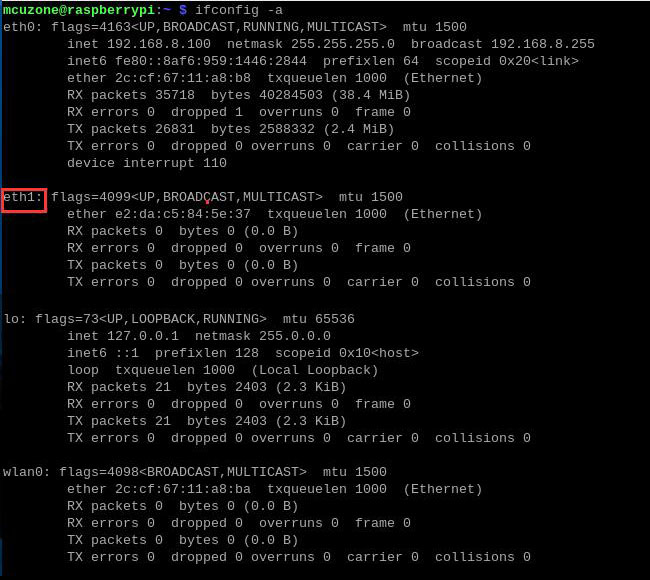
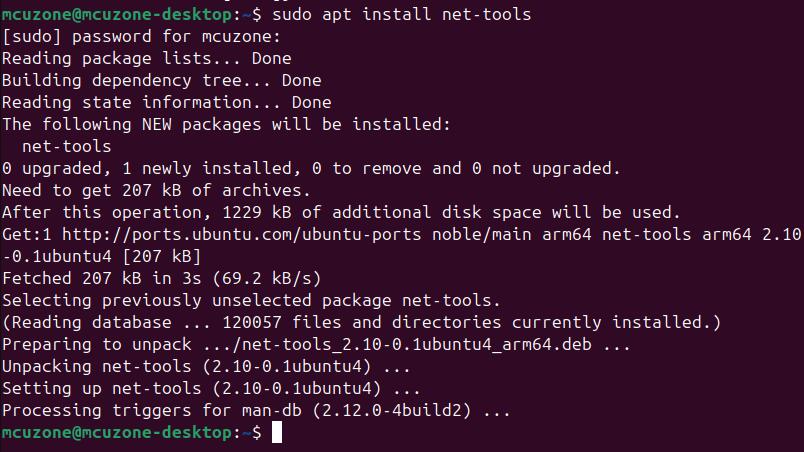
The ifconfig tool is not installed by default in Ubuntu systems, so it needs to be installed manually:
sudo apt install net-tools
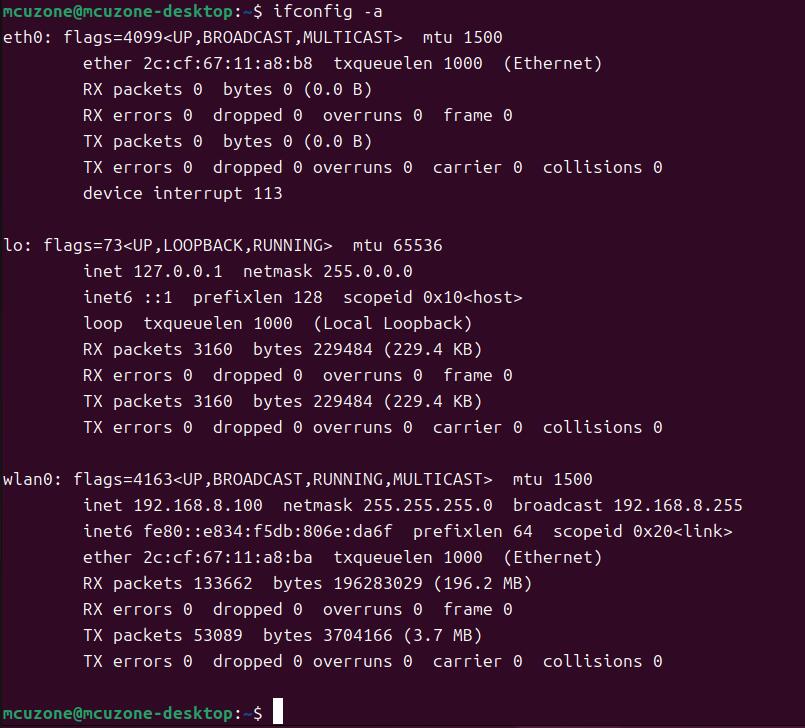
Enter ifconfig -a, and we can see that the 2.5G Ethernet is not displayed at this time:
Then we will begin installing the RTL8125 driver.
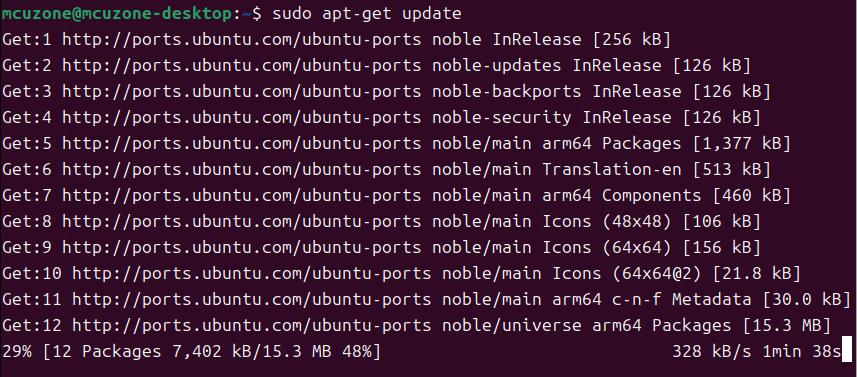
First, we need to update the system:
sudo apt-get update
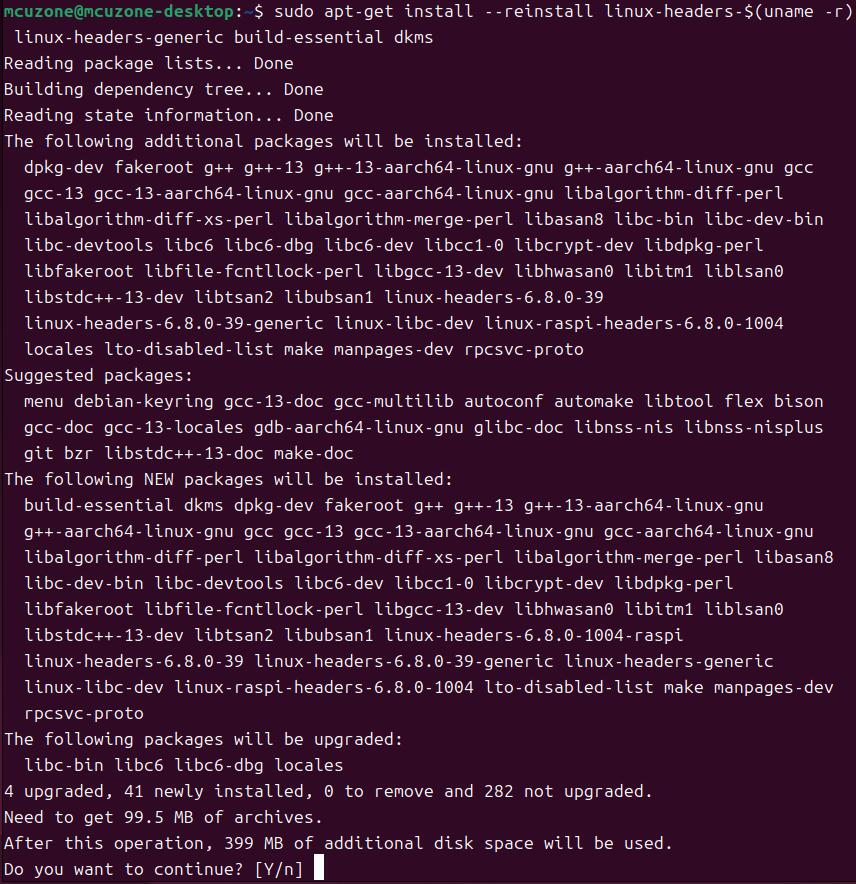
Then we need to prepare the compilation environment:
sudo apt-get install --reinstall linux-headers-$(uname -r) linux-headers-generic build-essential dkms
And install drivers:
sudo apt-get install r8125-dkms

After installation is complete, enter:
sudo modprobe r8125

Enter ifconfig -a to see a network interface named enxxx, which indicates that the 2.5G Ethernet driver has been successfully installed.
5.2 Internet test
Using the speed test website of USTC, we conducted a speed test for the 2.5G Ethernet connected to the internet (with a 200M connection), and the results are as follows:
Note: The speed test can be affected by the network environment and the testing method. Speeds should be considered based on actual results; this test is for reference only.
If the built-in Firefox browser in Ubuntu runs very slowly or frequently becomes unresponsive, it is recommended to install the lightweight browser Falkon:
sudo apt install falkon
5.3 2.5G Ethernet test in local network
Install the network speed testing tool iperf3:
sudo apt install iperf3
Use iperf3 to perform a speed test between the Raspberry Pi OS and the PC via a 2.5G router.
The speed test results for eth1 are as follows:
When the Ubuntu system acts as the client, the speed is about 2.35 Gbps:
When the Ubuntu system acts as the server, the speed is about 1.85 Gbps:
Note: The speed test can be affected by the network environment and the testing method. Speeds should be considered based on actual results; this test is for reference only.
VI. OpenWrt system operation demonstration
6.1 Overview
Under the OpenWrt system, the MP2.5GTPU expansion board defaults to the native Gigabit Ethernet port on the Raspberry Pi as the LAN port. We can use the 2.5G Ethernet on the expansion board as a LAN port and the native Ethernet on the Raspberry Pi 5 as a WAN port, thereby enabling high-speed file transfers within the local network using the 2.5G Ethernet.
6.2 Preparations
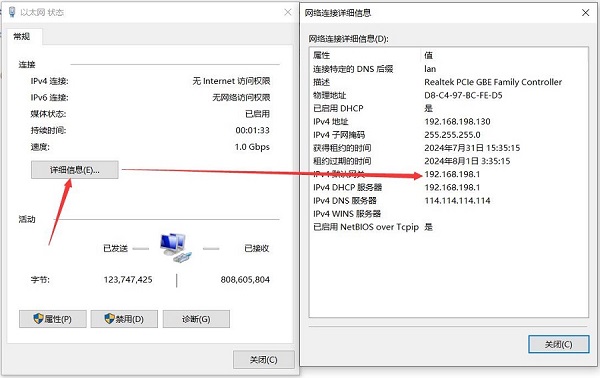
After flashing the OpenWrt system and powering the board on, we connect the Ethernet cable from the native Gigabit Ethernet port on the Raspberry Pi to the PC's Ethernet port. After the PC's network card successfully connects to the native Gigabit Ethernet port on the Raspberry Pi, we can find Network & Internet settings in the Windows settings. In the Ethernet open the "Change adapter options - Ethernet - Status" and view the IP address of the default gateway; this address is the backend configuration page address for the OpenWrt system. As shown in the figure, the address tested in this document is 192.168.198.1:
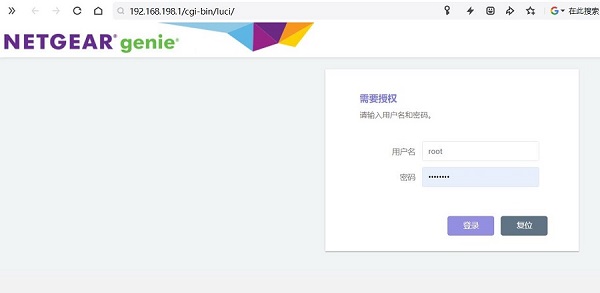
Then open a web browser and enter 192.168.198.1 to access the OpenWrt system. The default username is root, and the default password is password.
6.3 Configuration and application of the 2.5G Ethernet on the MP2.5GTPU
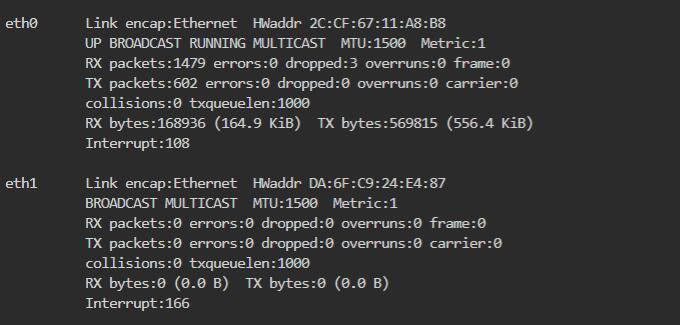
Click "System - TTYD Terminal" and enter the command ifconfig -a. We can see that there are two network interfaces: eth0 and eth1. eth0 is the native Ethernet port of the Raspberry Pi 5, and eth1 is the 2.5G Ethernet port of the expansion board:
The broadband we typically use does not exceed one gigabit. To achieve better local network performance, it is recommended to configure the Raspberry Pi 5's native Gigabit Ethernet port from its default LAN setting to WAN, and then configure the expansion board's 2.5G Ethernet port as LAN.
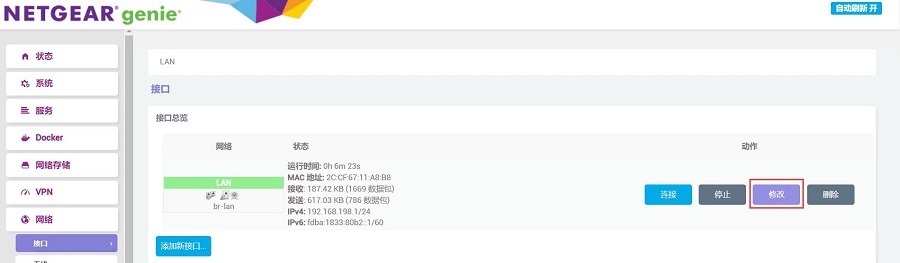
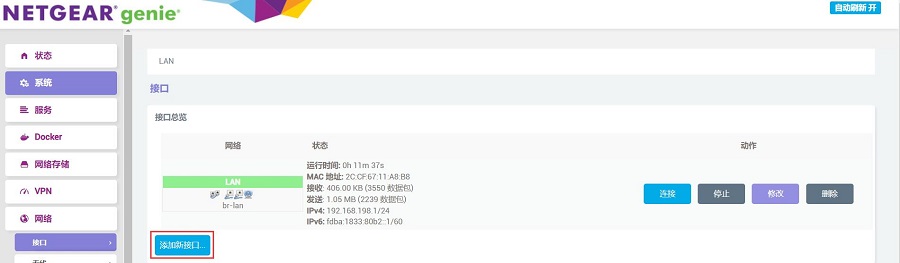
Click on "Network - Interfaces", then click "Modify":
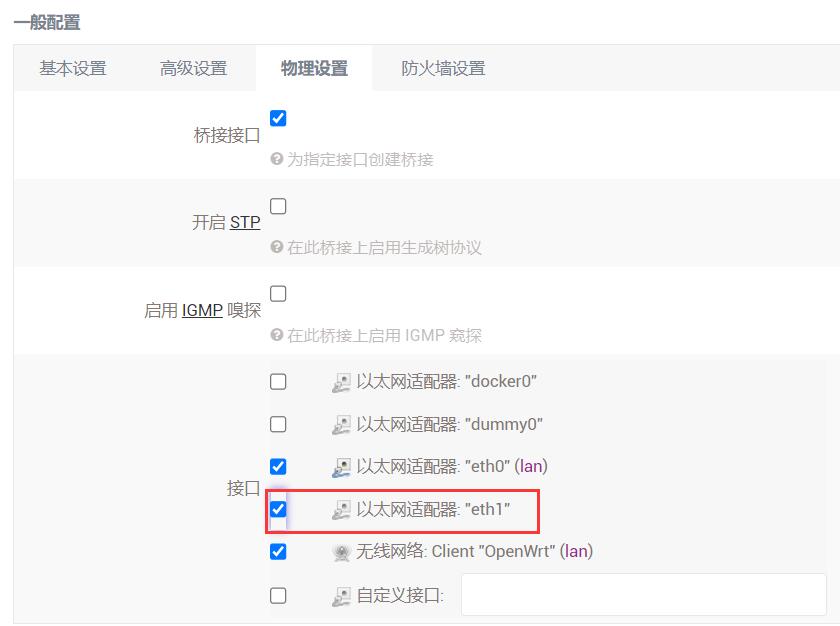
In the "Physical Settings", select eth1 and then click the "Save & Apply" button:
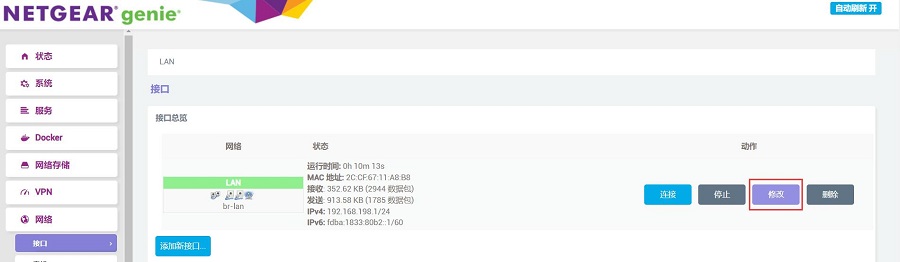
Remove the Ethernet cable from the native port of the Raspberry Pi 5 and insert it into the 2.5G Ethernet port. After the PC's network card successfully connects to the 2.5G Ethernet, we refresh the management page, click on "Network - Interfaces", and then click "Edit":
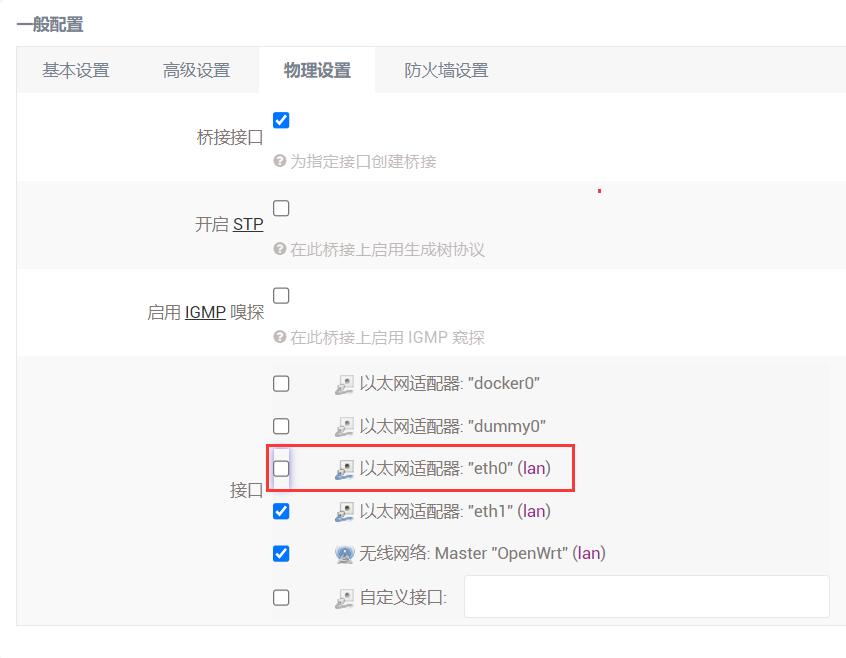
In the "Physical Settings", uncheck eth0, and then click the "Save" button:
Go back to "Network - Interfaces", and click "Add New Interface":
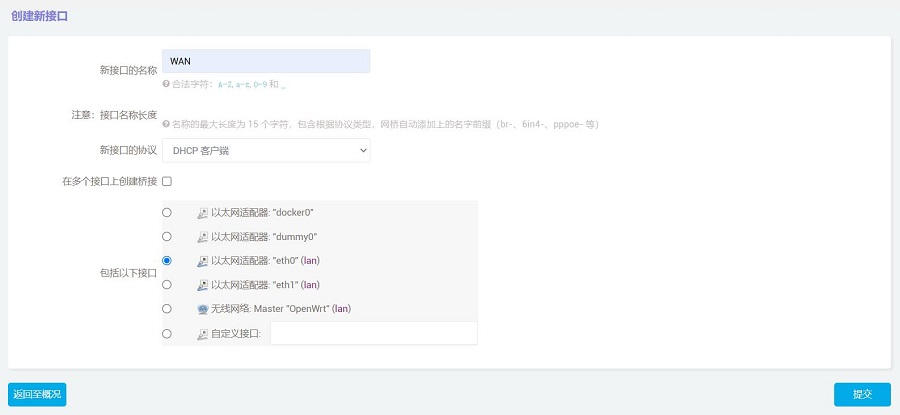
Set the interface name to WAN, select DHCP client for the interface protocol, choose eth0 for the interface, and then click the "Submit" button:
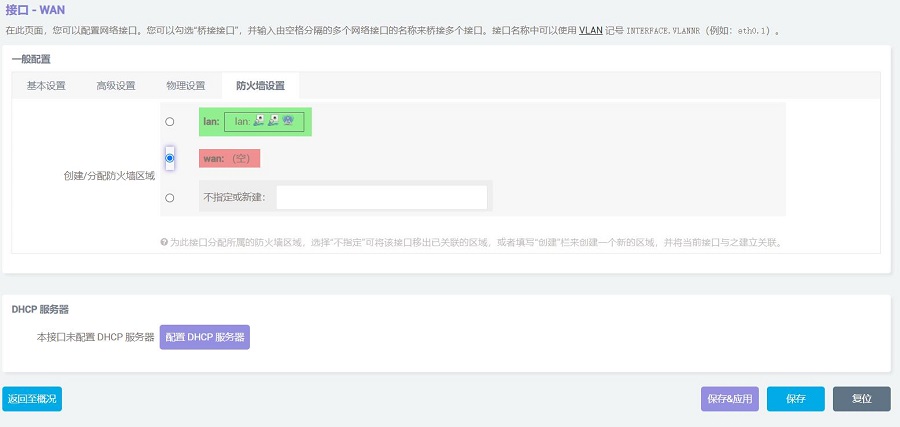
In the firewall settings, select the WAN and then click the "Save & Apply" button:
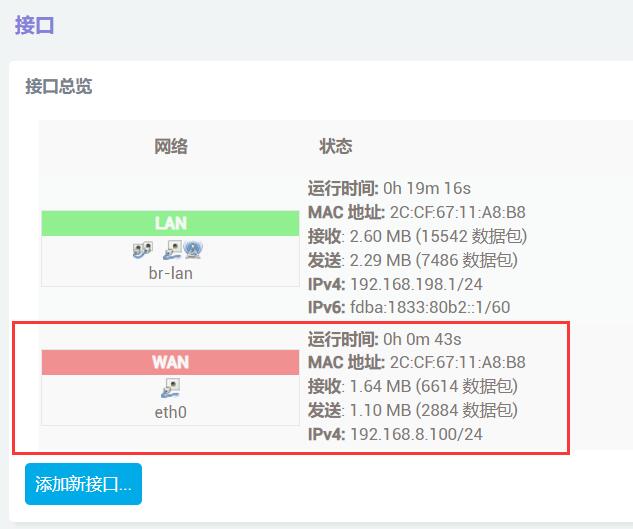
Plug the network cable connected to the Internet into the native Ethernet port of the Raspberry Pi 5, then go back to "Network - Interfaces". After a moment, we will see that the newly created WAN interface has obtained an IP address. The PC can access the internal network through the connected 2.5G Ethernet port. At this time, the network structure is such that the Gigabit Ethernet port (connected to the Internet, on the Raspberry Pi) is the input, and the 2.5G Ethernet port (connected to the internal network, on the expansion board) is the output:
We insert a USB3.0 supported USB drive or mobile hard disk into the USB3.0 port of the Raspberry Pi 5. Refer to the link below to configure this USB drive or external hard drive as a shared directory:
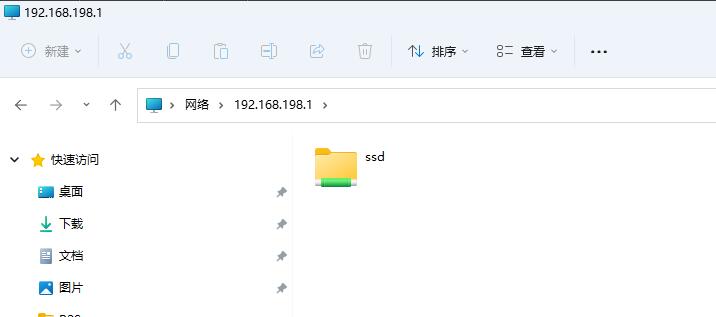
After setting it up, we enter \\192.168.198.1 in the File Explorer (The address is that of the expansion board, which may vary depending on the actual situation), and we will then be able to see the shared directory:
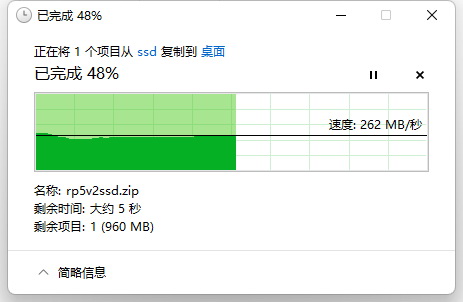
Copy any file to the desktop for a read speed test:
Copy any file to the SSD for a write speed test:
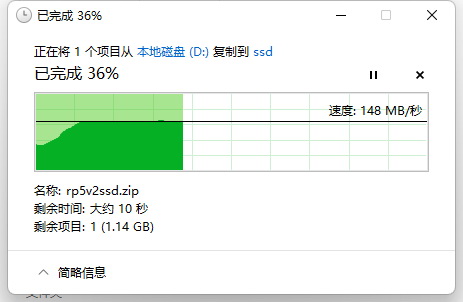
Note: The speed test can be affected by the network environment and the testing method. Speeds should be considered based on actual results; this test is for reference only.
6.4 Other applications
The wireless module of the Raspberry Pi 5 can function as a wireless AP or as a wireless WAN port. For the implementation of these applications, please refer to the following link:
VII. Run the TPU module on Raspberry Pi OS
This chapter introduces how to run the TPU module on the Raspberry Pi OS.
Note: The operation requires a stable internet connection to the regions out of China (you may need to find your own method). Otherwise, many files may not download or may only partially download, which could ultimately lead to the code failing to run.
7.1 Config config.txt
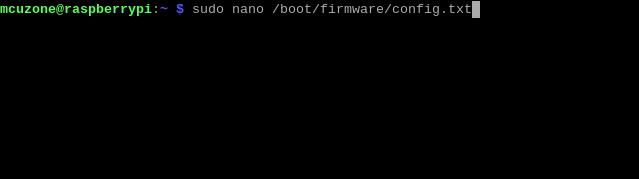
After the system boots, open the Raspberry Pi terminal and enter the command:
sudo nano /boot/firmware/config.txt
Or:
sudo mousepad /boot/firmware/config.txt
Add the codes in the ending of this file:
dtparam=pciex1
kernel=kernel8.img
dtoverlay=pineboards-hat-ai
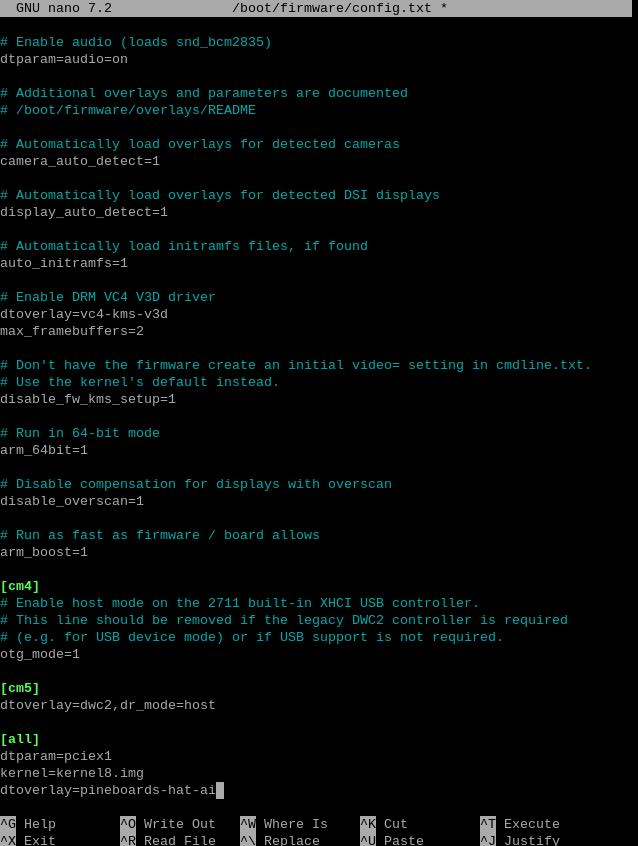
Then, save the file and reboot the system:
sudo reboot
7.2 Ensuring software environment
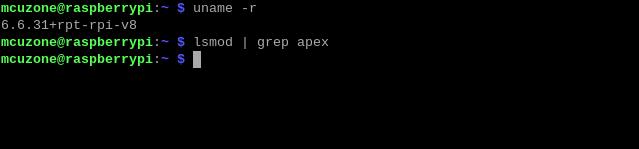
After reboot the system, open the Raspberry Pi terminal and enter the command:
uname -r
After ensuring the kernel version is greater than 4.18, enter:
lsmod | grep apex
Ensure there is no output, then you can begin installing the TPU driver.
7.3 Install necessary software
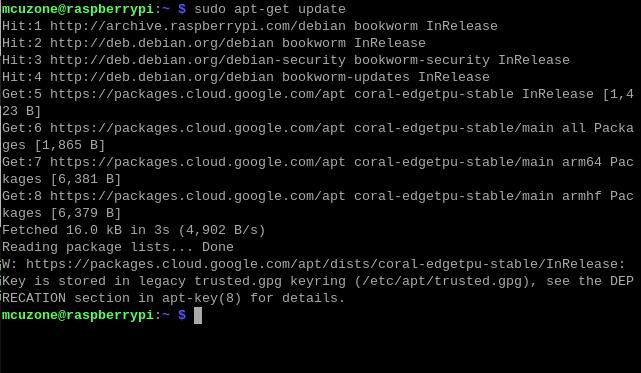
Ensure the network is connected to internet connection to the regions out of China (you may need to find your own method), and then add the Google TPU software library:
echo "deb https://packages.cloud.google.com/apt coral-edgetpu-stable main" | sudo tee /etc/apt/sources.list.d/coral-edgetpu.list
curl https://packages.cloud.google.com/apt/doc/apt-key.gpg | sudo apt-key add -

Update the software list after adding:
sudo apt-get update
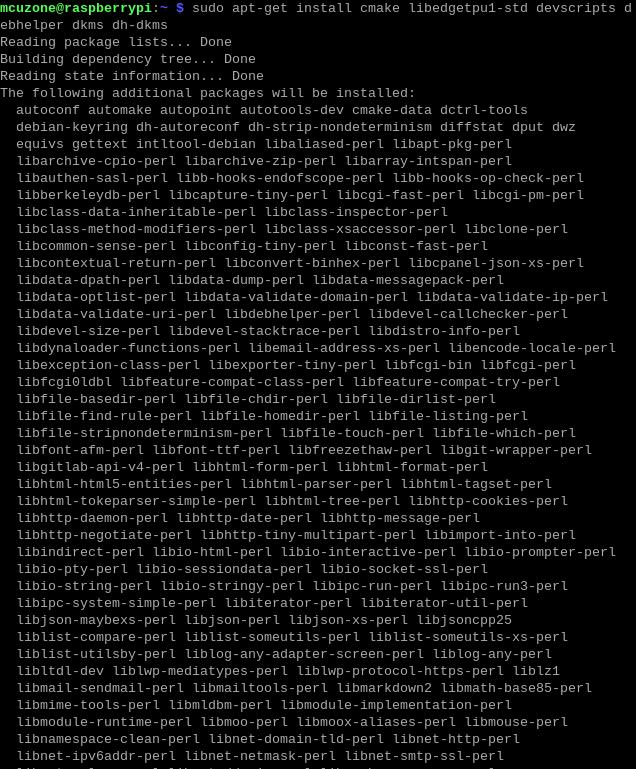
Install the necessary software after the update is completed:
sudo apt-get install cmake libedgetpu1-std devscripts debhelper dkms dh-dkms

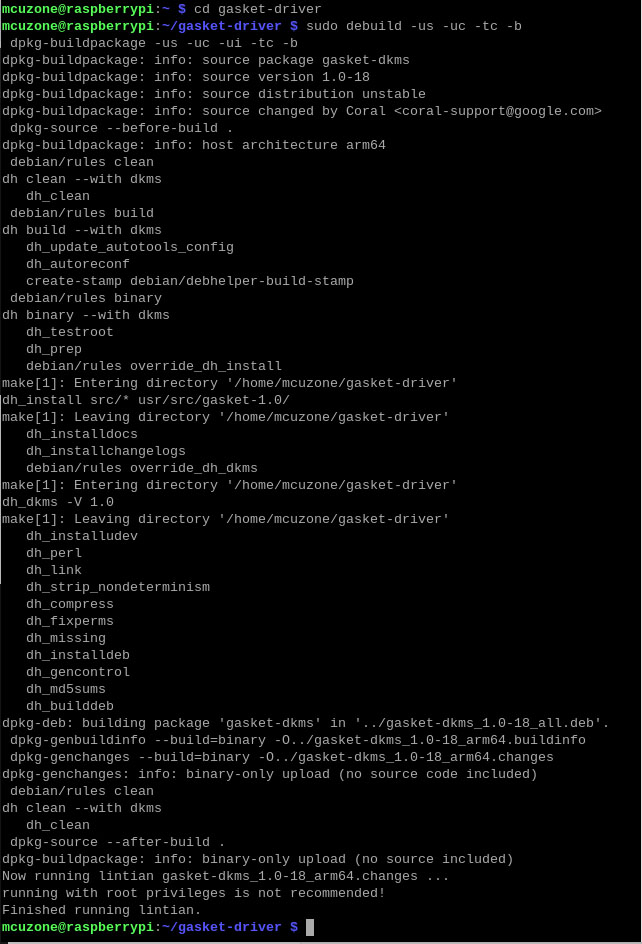
7.4 Install Gasket Driver
Enter the following commands in sequence to install the Gasket Driver:
git clone https://github.com/google/gasket-driver.git
cd gasket-driver
sudo debuild -us -uc -tc -b
cd ..
sudo dpkg -i gasket-dkms_1.0-18_all.deb

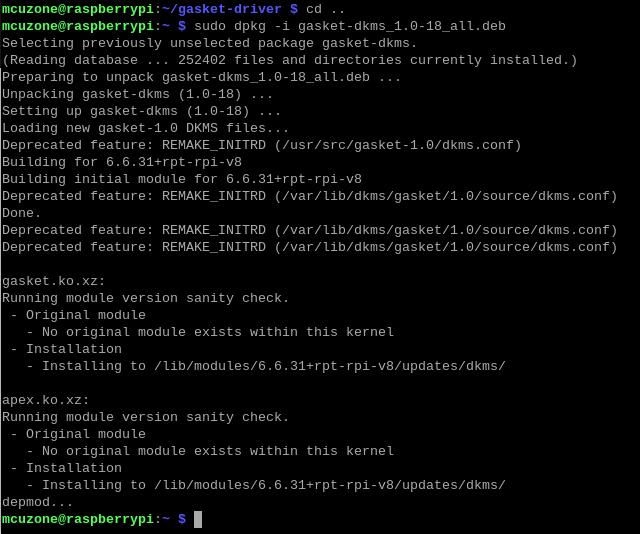
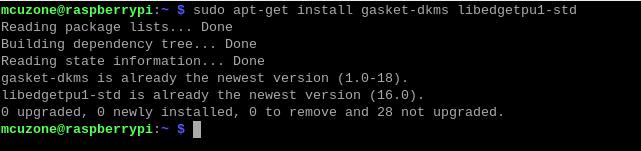
After the installation is complete, enter the following command to ensure that the driver and software were installed successfully:
sudo apt-get install gasket-dkms libedgetpu1-std
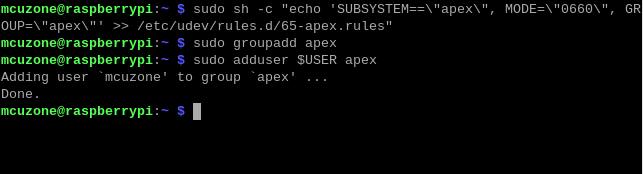
Then, add a udev rule to obtain device operation permissions:
sudo sh -c "echo 'SUBSYSTEM==\"apex\", MODE=\"0660\", GROUP=\"apex\"' >> /etc/udev/rules.d/65-apex.rules"
add user to apex:
sudo groupadd apex
sudo adduser $USER apex
Reboot the system after the setup is complete:
sudo reboot
7.5 Verification module testing and driver installation
After system starting, verification module testing and driver installation:
lspci -nn | grep 089a
Here, you need to see the TPU module, as shown in the following figure (specific parameter display is subject to the actual device):
ls /dev/apex_0
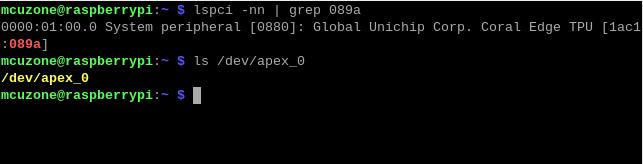
This board has a single TPU onboard, so you can see a TPU module:
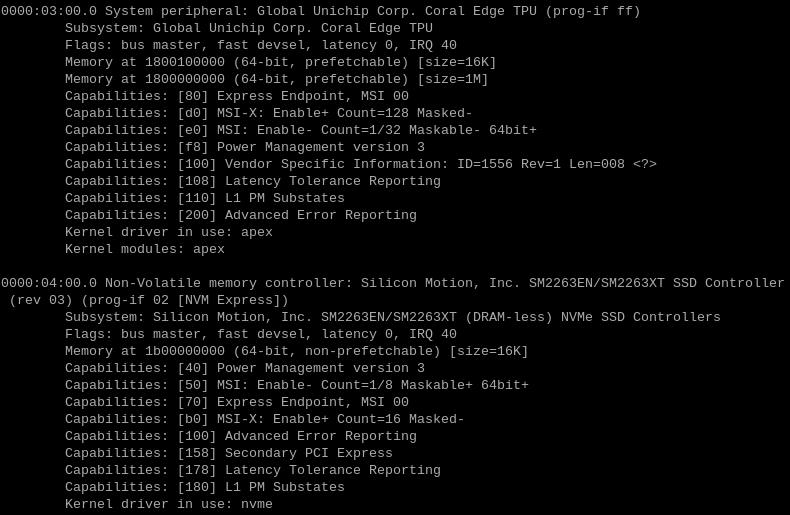
By entering sudo lspci -v, you can see the driver loading, this must include the TPU driver, and if an SSD is inserted, it also needs to include the SSD module, as shown in the following figure:
7.6 Configuration of the Code Execution Environment
Running Google TPU module code requires Python versions between 3.6 and 3.9, while the latest Raspberry Pi system is Python 3.11. Therefore, we need to use Pyenv to download an older version of Python.
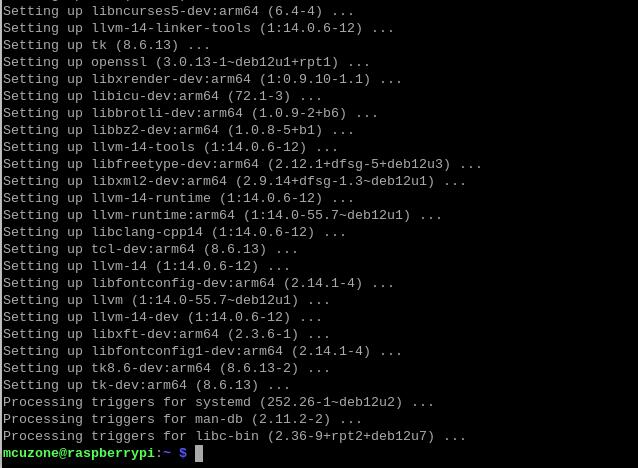
First, install the depends:
sudo apt-get install -y make build-essential libssl-dev zlib1g-dev \libbz2-dev libreadline-dev libsqlite3-dev wget curl llvm libncurses5-dev \libncursesw5-dev xz-utils tk-dev libffi-dev liblzma-dev python3-openssl

Install pyenv after the depends are installed:
curl https://pyenv.run | bash

Enter the command:
sudo nano ~/.bashrc
Or:
sudo mousepad ~/.bashrc
Add the codes in the ending of this file:
export PYENV_ROOT="$HOME/.pyenv"
[[ -d $PYENV_ROOT/bin ]] && export PATH="$PYENV_ROOT/bin:$PATH"
eval "$(pyenv init -)"


Save and exit after adding, then reload the shell:
exec "$SHELL"

Then, we can use pyenv to install an older version of Python:
pyenv install -v 3.8.8


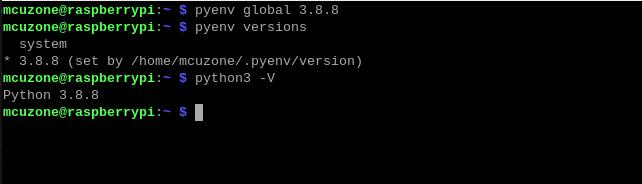
After the installation is successful, we will change the system Python version to 3.8.8:
pyenv global 3.8.8
After the change is successful, you can check the current Python version is 3.8.8:
pyenv versions
python3 -V
7.7 Download the code and run the module
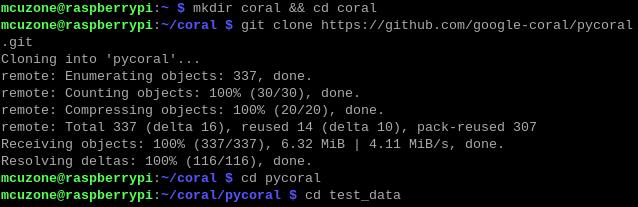
Enter the following commands in sequence to download:
mkdir coral && cd coral
git clone https://github.com/google-coral/pycoral.git
cd pycoral
cd test_data
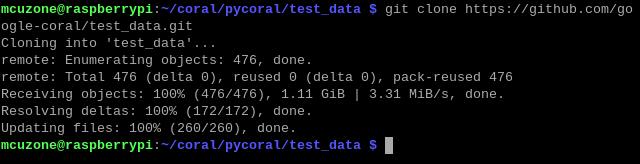
git clone https://github.com/google-coral/test_data.git
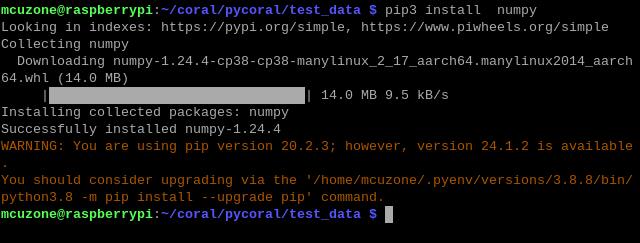
Then, download the code and run the module:
pip3 install numpy
pip3 install Pillow

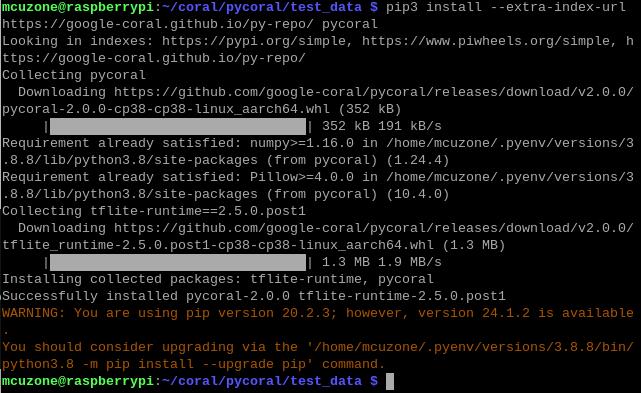
pip3 install --extra-index-url https://google-coral.github.io/py-repo/ pycoral
7.8 Run the code
After the module download is complete, back to the coral/pycoral path:
cd ..
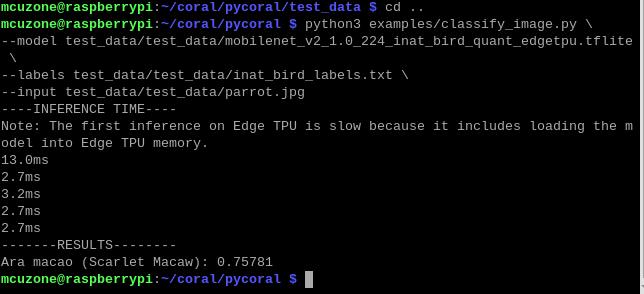
Enter the following code to run it:

Note: You can copy the following code, but please paste it into a text editor first. Then, following the format shown above, remove any extra enter. After that, copy it again and paste it into the terminal to run.
python3 examples/classify_image.py \
--model test_data/test_data/mobilenet_v2_1.0_224_inat_bird_quant_edgetpu.tflite \
--labels test_data/test_data/inat_bird_labels.txt \
--input test_data/test_data/parrot.jpg
Contact Us


 QQ:8204136
Email: mcuzone@vip.qq.com
Tel: +86(0)13957118045
If there are any omissions, errors, or infringements on this page, please contact us through the above methods. Thank you!
Copyright 2004-2024 Wildchip