0022 MPSTPU(M.2 M) EN
关键词
树莓派5、PCIe、TPU、DTPU、驱动安装、操作演示、AI、google、Coral、2230、2242、2280、NVMe SSD、固态硬盘 X1
一、简介
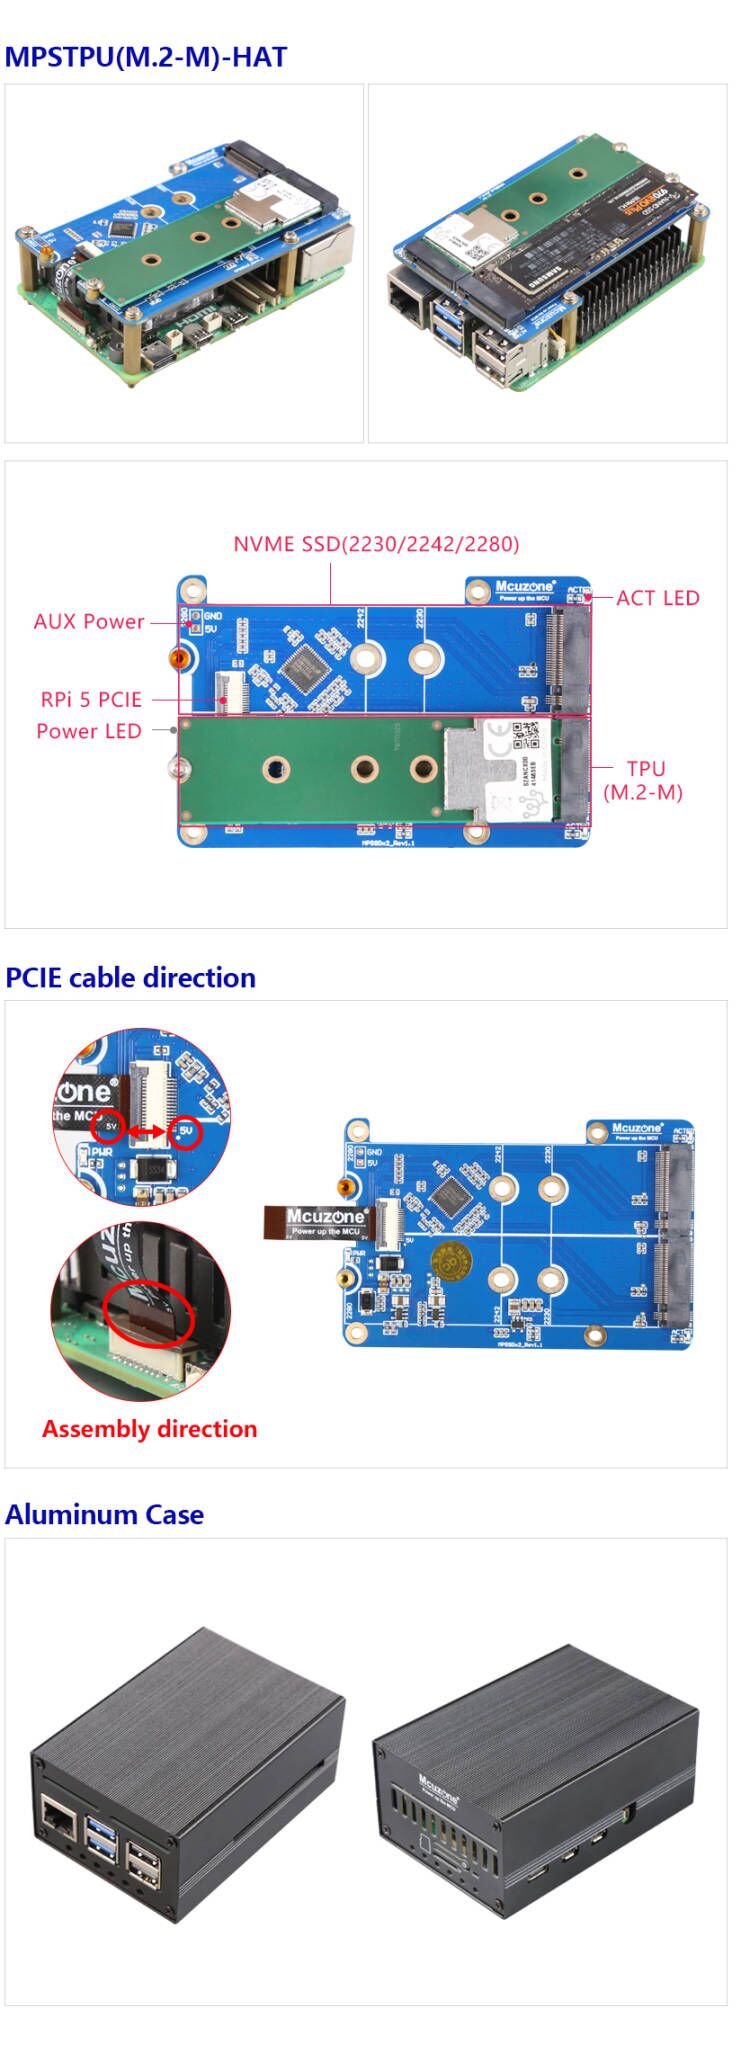
Coral M.2加速器是一款M.2尺寸的模组,可以通过PCIE接口为树莓派等平台扩展边缘TPU协处理器。我司的MPSTPU扩展板通过PCIe Switch扩展出了两路PCIe接口,其中一路为M.2 M-key接口,可外接M-Key接口的TPU模组;另一路为M.2 M key接口,可外接NVMe SSD固态硬盘。MPSTPU扩展板可在加入TPU边缘计算能力的同时为系统提供SSD海量存储。
二、硬件资源
1. 利用树莓派5的PCIe接口,采用PCie Switch芯片,将PCIe一扩二;采用0.5mm间距16Pin PCIe2.0 x1接口连接;
2. 引出一路PCIE M.2 M-key接口,支持NVMe协议2230/2242/2280尺寸固态硬盘(默认焊接2280固定柱);注意:不支持NGFF和SATA协议的盘;
3. 引出一路PCIE M.2 M-key,支持M key接口的Google Coral Edge TPU;
4. 引出一路5V电源指示灯("PWR"),一路硬盘工作状态指示灯;
5. 设计采用1.5A高效DC-DC电路,可支持绝大部分固态盘(受限于x1接口,固态盘的实际峰值功耗仅为额定功耗的1/3);
6. 扩展板采用内凹开槽设计,40Pin上方无遮挡不影响杜邦线连接;
7. 四个M2.5固定孔,和树莓派5定位孔吻合;
8. 沉金工艺,无铅生产;PCB板符合UL和RoHS认证,防火等级94V-0;
9. 可选配铝合金外壳。
三、系统烧写及设置
3.1 概述
本文档采用树莓派OS、Ubuntu系统和OpenWrt系统进行测试。
1) 树莓派OS的版本为2024-07-04-raspios-bookworm-arm64.img.xz,树莓派OS下载地址:
https://www.raspberrypi.com/software/operating-systems/#raspberry-pi-os-64-bit
2) Ubuntu系统的版本为ubuntu-24.04-preinstalled-desktop-arm64+raspi.img.xz,Ubuntu OS下载地址:
https://ubuntu.com/download/raspberry-pi
3) OpenWrt系统版本:
openwrt-bcm27xx-bcm2712-rpi-5-squashfs-sysupgrade-linux-6.1.100-20240805.img.gz
3.2 系统烧写在SD(TF)卡上
3.3 系统烧写在SSD硬盘上
IV. Run the TPU module on the Raspberry Pi OS
4.1 Run the TPU module
This chapter introduces how to run the TPU module on the Raspberry Pi OS.
The steps in this chapter apply to both systems booting from TF card and from SSD.
4.1.1 Config config.txt
After the system boots, open the Raspberry Pi terminal and enter the command:
sudo nano /boot/firmware/config.txt
Or:
sudo mousepad /boot/firmware/config.txt
Add the codes in the ending of this file:
dtparam=pciex1
kernel=kernel8.img
dtoverlay=pineboards-hat-ai

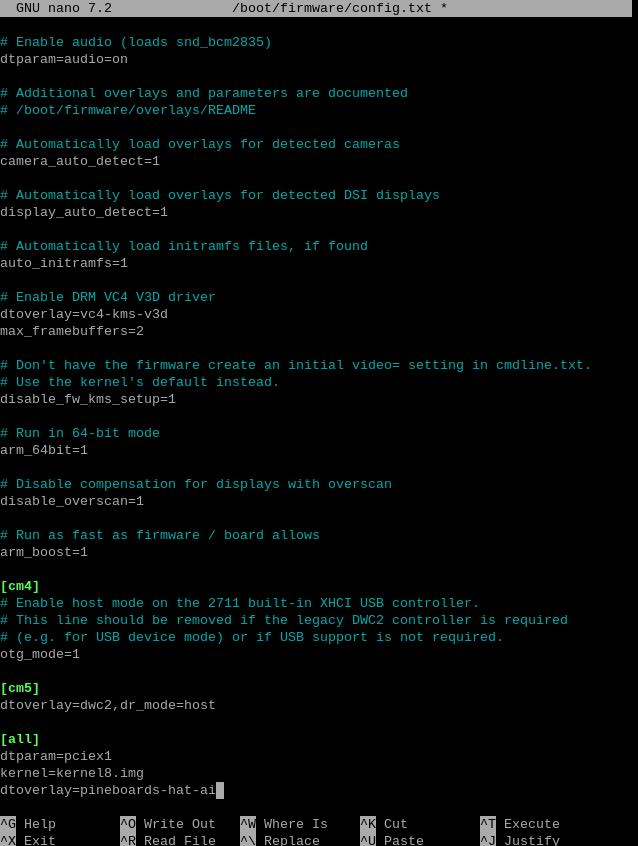
Then, save the file and reboot the system:
sudo reboot
4.1.2 Ensuring software environment
After reboot the system, open the Raspberry Pi terminal and enter the command:
uname -r
After ensuring the kernel version is greater than 4.18, enter:
lsmod | grep apex
Ensure there is no output, then you can begin installing the TPU driver.

4.1.3 Install necessary software
Ensure the network is connected to internet connection to the regions out of China (you may need to find your own method), and then add the Google TPU software library:
echo "deb https://packages.cloud.google.com/apt coral-edgetpu-stable main" | sudo tee /etc/apt/sources.list.d/coral-edgetpu.list
curl https://packages.cloud.google.com/apt/doc/apt-key.gpg | sudo apt-key add -

Update the software list after adding:
sudo apt-get update
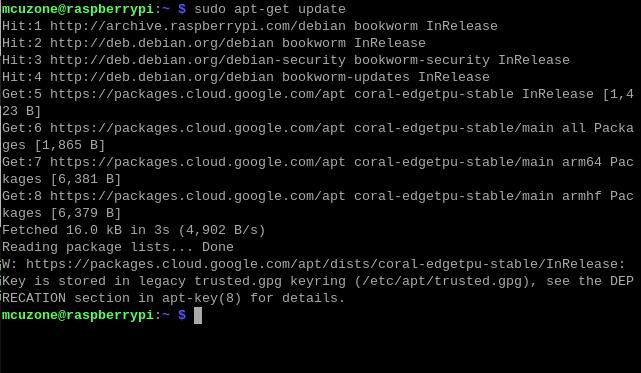
Install the necessary software after the update is completed:
sudo apt-get install cmake libedgetpu1-std devscripts debhelper dkms dh-dkms
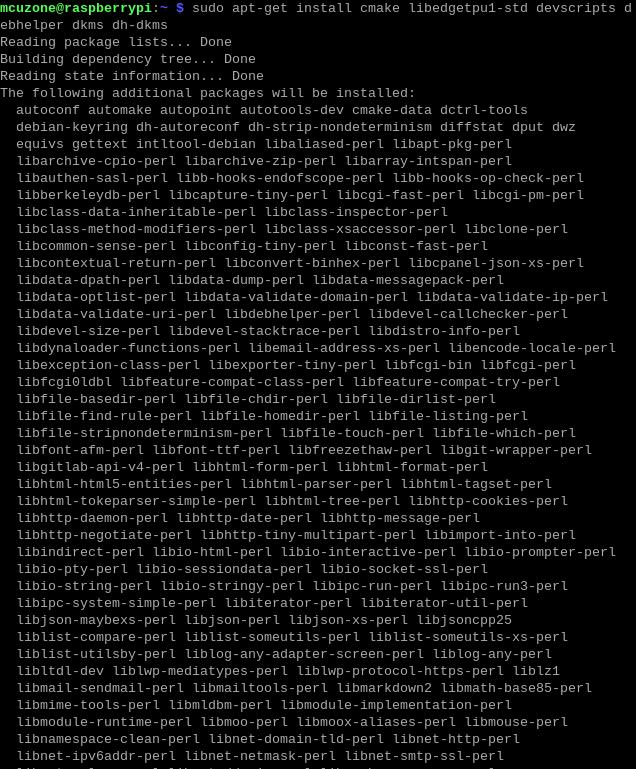

4.1.4 Install Gasket Driver
Enter the following commands in sequence to install the Gasket Driver:
git clone https://github.com/google/gasket-driver.git
cd gasket-driver
sudo debuild -us -uc -tc -b
cd ..
sudo dpkg -i gasket-dkms_1.0-18_all.deb

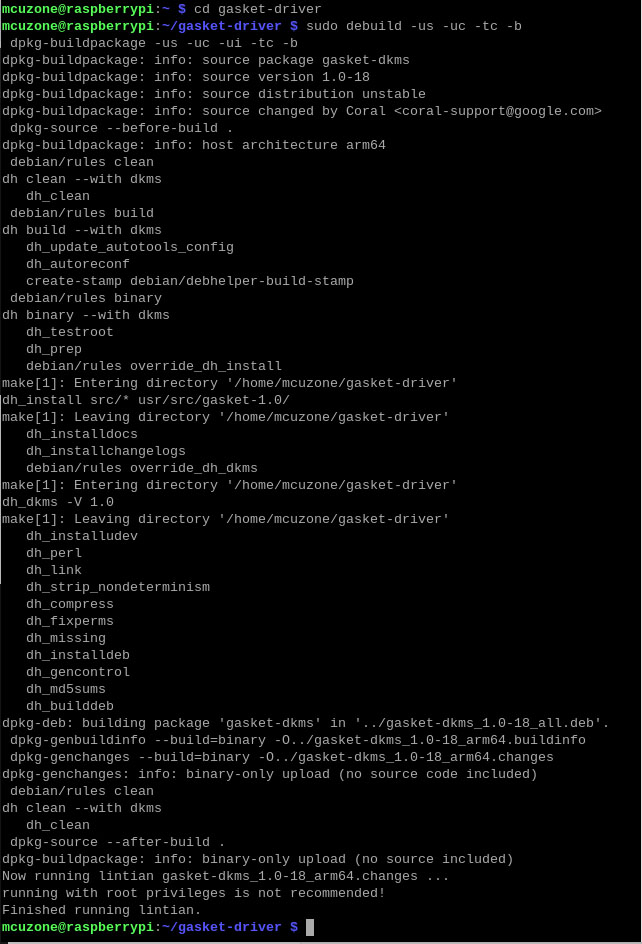
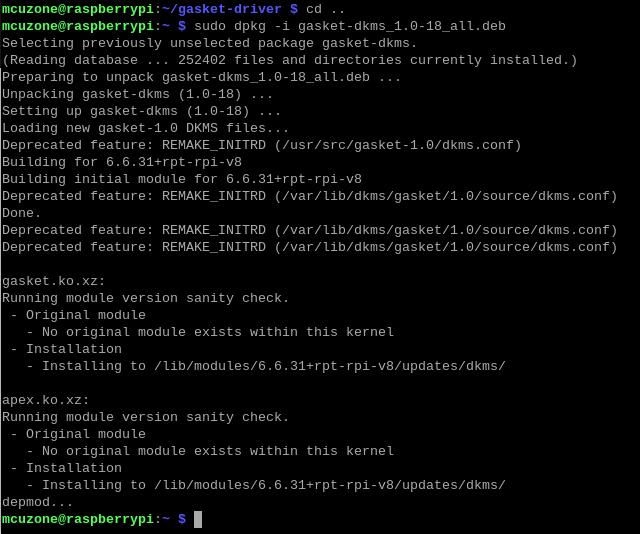
After the installation is complete, enter the following command to ensure that the driver and software were installed successfully:
sudo apt-get install gasket-dkms libedgetpu1-std

Then, add a udev rule to obtain device operation permissions:
sudo sh -c "echo 'SUBSYSTEM==\"apex\", MODE=\"0660\", GROUP=\"apex\"' >> /etc/udev/rules.d/65-apex.rules"
add user to apex:
sudo groupadd apex
sudo adduser $USER apex

Reboot the system after the setup is complete:
sudo reboot
4.1.5 Verification module testing and driver installation
After system starting, verification module testing and driver installation:
lspci -nn | grep 089a
Here, you need to see the TPU module, as shown in the following figure (specific parameter display is subject to the actual device):
ls /dev/apex_0

This board has a single TPU onboard, so you can see a TPU module:
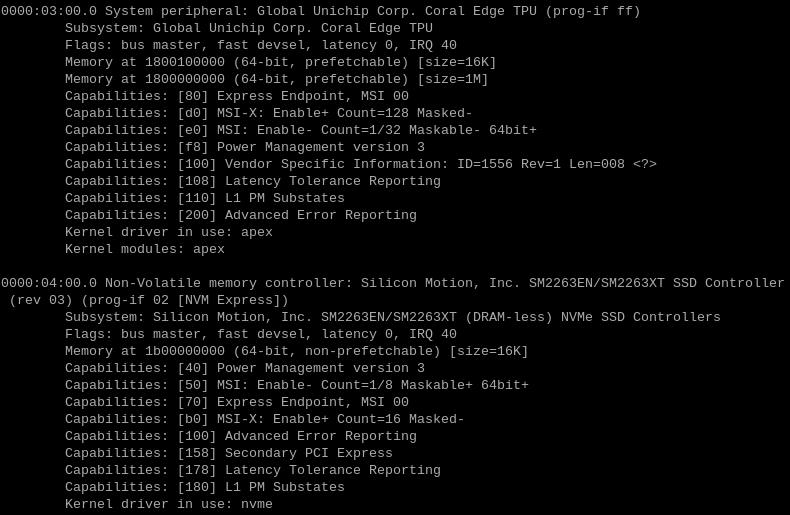
By entering sudo lspci -v, you can see the driver loading, this must include the TPU driver, and if an SSD is inserted, it also needs to include the SSD module, as shown in the following figure:
4.1.6 Configuration of the Code Execution Environment
Running Google TPU module code requires Python versions between 3.6 and 3.9, while the latest Raspberry Pi system is Python 3.11. Therefore, we need to use Pyenv to download an older version of Python.
First, install the depends:
sudo apt-get install -y make build-essential libssl-dev zlib1g-dev \libbz2-dev libreadline-dev libsqlite3-dev wget curl llvm libncurses5-dev \libncursesw5-dev xz-utils tk-dev libffi-dev liblzma-dev python3-openssl

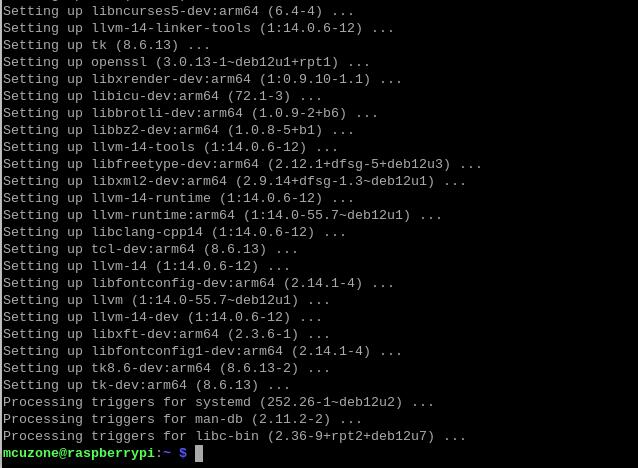
Install pyenv after the depends are installed:
curl https://pyenv.run | bash

Enter the command:
sudo nano ~/.bashrc
Or:
sudo mousepad ~/.bashrc
Add the codes in the ending of this file:
export PYENV_ROOT="$HOME/.pyenv"
[[ -d $PYENV_ROOT/bin ]] && export PATH="$PYENV_ROOT/bin:$PATH"
eval "$(pyenv init -)"

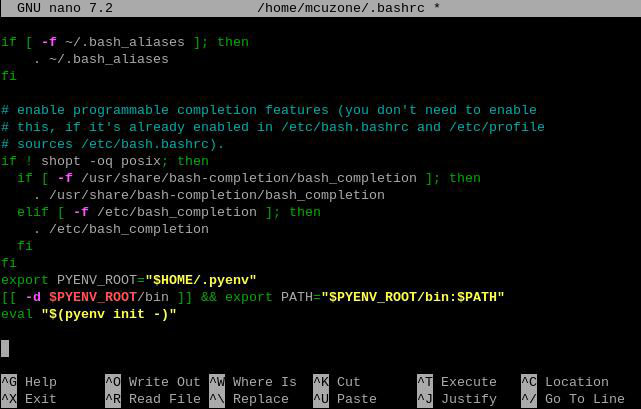
Save and exit after adding, then reload the shell:
exec "$SHELL"

Then, we can use pyenv to install an older version of Python:
pyenv install -v 3.8.8


After the installation is successful, we will change the system Python version to 3.8.8:
pyenv global 3.8.8
After the change is successful, you can check the current Python version is 3.8.8:
pyenv versions
python3 -V

4.1.7 Download the code and run the module
Enter the following commands in sequence to download:
mkdir coral && cd coral
git clone https://github.com/google-coral/pycoral.git
cd pycoral
cd test_data
git clone https://github.com/google-coral/test_data.git


Then, download the code and run the module:
pip3 install numpy
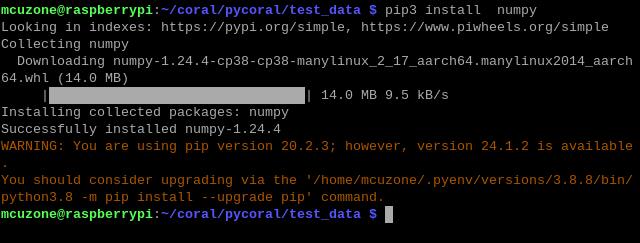
pip3 install Pillow

pip3 install --extra-index-url https://google-coral.github.io/py-repo/ pycoral
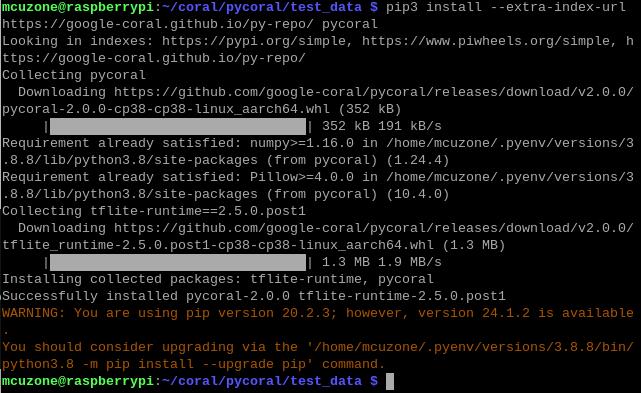
4.1.8 Run the code
After the module download is complete, back to the coral/pycoral path:
cd ..
Enter the following code to run it:

Note: You can copy the following code, but please paste it into a text editor first. Then, following the format shown above, remove any extra enter. After that, copy it again and paste it into the terminal to run.
python3 examples/classify_image.py \
--model test_data/test_data/mobilenet_v2_1.0_224_inat_bird_quant_edgetpu.tflite \
--labels test_data/test_data/inat_bird_labels.txt \
--input test_data/test_data/parrot.jpg
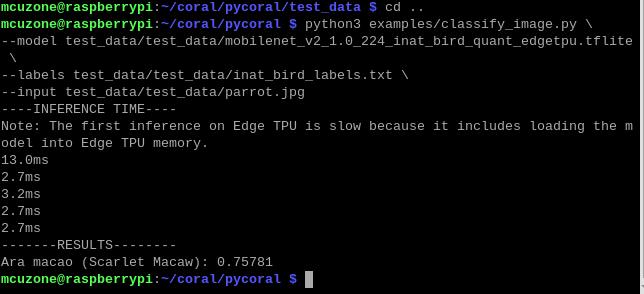
4.2 NVME SSD硬盘的使用
关于对SSD硬盘的基本操作,我们可以参考以下链接:
关于如何测试SSD硬盘,我们可以参考以下链接:
五、Ubuntu系统下使用SSD硬盘
关于对SSD硬盘的基本操作,我们可以参考以下链接,除了SSD用作存储扩展中与树莓派OS下操作略有不同,其余部分基本相同:
关于如何测试SSD硬盘,我们可以参考以下链接:
六、OpenWrt系统下使用SSD硬盘
关于如何在OpenWrt系统下使用SSD硬盘,我们可以参考以下链接:
联系我们
电话:13957118045
如本页面有任何疏漏、错误或者侵权,请通过上述途径联系我们,谢谢!
Copyright 2004-2025 野芯科技


 QQ:8204136