0021 MPSAI EN:修订间差异
| 第48行: | 第48行: | ||
[[0005 MPS2242 2280 2280P(单SSD扩展板)#3.3 从SSD硬盘启动|点击直达烧写方法说明]]。 | [[0005 MPS2242 2280 2280P(单SSD扩展板)#3.3 从SSD硬盘启动|点击直达烧写方法说明]]。 | ||
== ''' | == '''IV. AI (HAILO 8L) usage Demonstration on the Raspberry Pi OS''' == | ||
=== 4.1 | === 4.1 Overview === | ||
In various practical applications, the demand for camera image detection and recognition is gradually increasing, and there are many AI-based solutions available on the market. The solution demonstrated in this article involves the OV5647 camera, the MPSAI, and the HAILO 8L AI module paired with the Raspberry Pi 5. | In various practical applications, the demand for camera image detection and recognition is gradually increasing, and there are many AI-based solutions available on the market. The solution demonstrated in this article involves the OV5647 camera, the MPSAI, and the HAILO 8L AI module paired with the Raspberry Pi 5. | ||
| 第71行: | 第71行: | ||
http://www.mcuzone.com/wiki/0005_MPS2242_2280/0005_MPS2242_2280_29.jpg | http://www.mcuzone.com/wiki/0005_MPS2242_2280/0005_MPS2242_2280_29.jpg | ||
4.2.2 | 4.2.2 Run <code>sudo rpi-eeprom-update</code>to check the Raspberry Pi firmware and ensure that the firmware date is after December 6, 2023: | ||
http://www.mcuzone.com/wiki/0005_MPS2242_2280/0005_MPS2242_2280_30.jpg | http://www.mcuzone.com/wiki/0005_MPS2242_2280/0005_MPS2242_2280_30.jpg | ||
As shown in the above figure, the firmware date is June 5, 2024. | |||
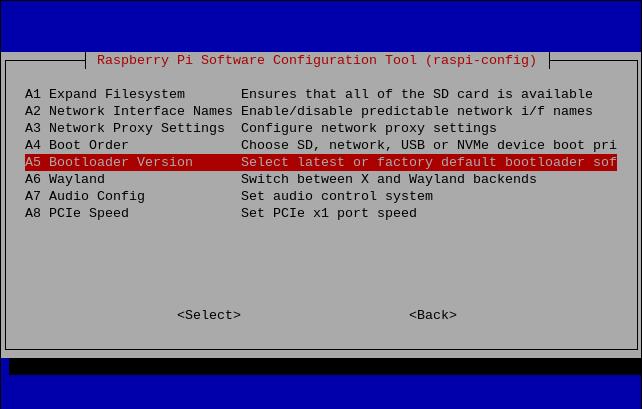
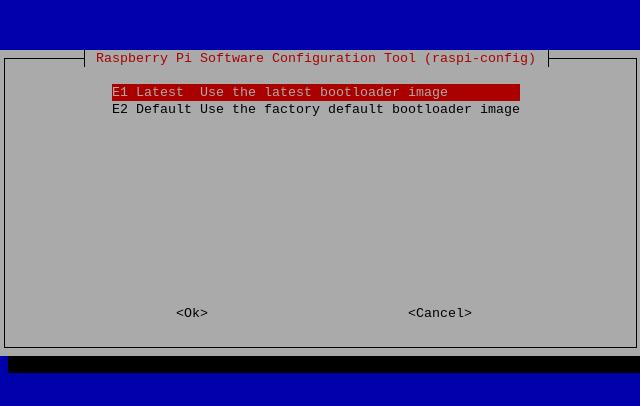
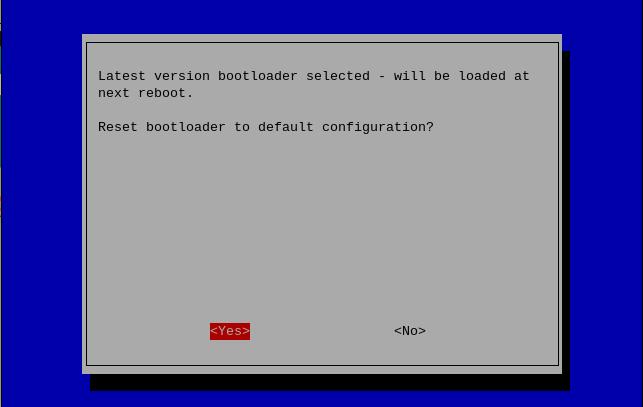
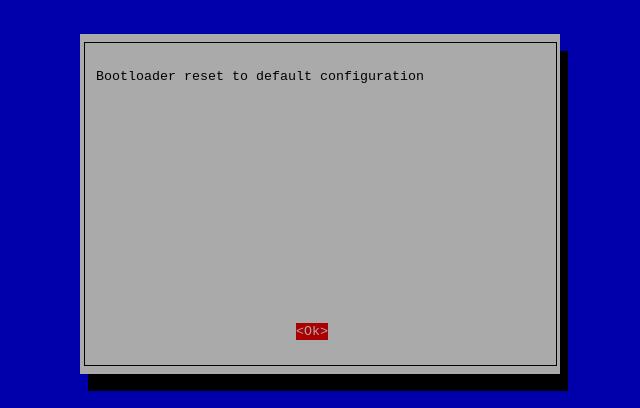
4.2.3 | 4.2.3 Run <code>sudo raspi-config</code> ,select the corresponding options in sequence according to the following diagram: | ||
http://www.mcuzone.com/wiki/0005_MPS2242_2280/0005_MPS2242_2280_31.jpg | http://www.mcuzone.com/wiki/0005_MPS2242_2280/0005_MPS2242_2280_31.jpg | ||
| 第91行: | 第91行: | ||
http://www.mcuzone.com/wiki/0005_MPS2242_2280/0005_MPS2242_2280_36.jpg | http://www.mcuzone.com/wiki/0005_MPS2242_2280/0005_MPS2242_2280_36.jpg | ||
After making your selection and exiting, the system will automatically restart. If it does not restart automatically, please manually execute <code>sudo reboot</code> to restart the system. | |||
=== 4.3 | === 4.3 Install the depends required for the AI module === | ||
Run <code>sudo apt install hailo-all</code>, install the depends required for the AI module: | |||
http://www.mcuzone.com/wiki/0005_MPS2242_2280/0005_MPS2242_2280_37.jpg | http://www.mcuzone.com/wiki/0005_MPS2242_2280/0005_MPS2242_2280_37.jpg | ||
| 第100行: | 第100行: | ||
http://www.mcuzone.com/wiki/0005_MPS2242_2280/0005_MPS2242_2280_38.jpg | http://www.mcuzone.com/wiki/0005_MPS2242_2280/0005_MPS2242_2280_38.jpg | ||
After completing this, execute <code>sudo reboot</code> to restart the system and apply these settings. | |||
Run <code>hailortcli fw-control identify</code>, If the following output appears, it indicates that the depends for HAILO 8L have been successfully installed: | |||
http://www.mcuzone.com/wiki/0005_MPS2242_2280/0005_MPS2242_2280_39.jpg | http://www.mcuzone.com/wiki/0005_MPS2242_2280/0005_MPS2242_2280_39.jpg | ||
Finally, execute <code>rpicam-hello -t 10s</code> to turn on the camera and bring up the preview window, ensuring that the camera is functioning normally. | |||
http://www.mcuzone.com/wiki/0005_MPS2242_2280/0005_MPS2242_2280_40.jpg | http://www.mcuzone.com/wiki/0005_MPS2242_2280/0005_MPS2242_2280_40.jpg | ||
=== 4.4 | === 4.4 Image recognition and detection === | ||
Run: | |||
<code>git clone --depth 1 <nowiki>https://github.com/raspberrypi/rpicam-apps.git</nowiki> ~/rpicam-apps</code> | <code>git clone --depth 1 <nowiki>https://github.com/raspberrypi/rpicam-apps.git</nowiki> ~/rpicam-apps</code> | ||
Clone the library of rpicam-apps: | |||
http://www.mcuzone.com/wiki/0005_MPS2242_2280/0005_MPS2242_2280_41.jpg | http://www.mcuzone.com/wiki/0005_MPS2242_2280/0005_MPS2242_2280_41.jpg | ||
After cloning is completed, you can begin image recognition and detection: | |||
<code>rpicam-hello -t 0 --post-process-file ~/rpicam-apps/assets/hailo_yolov6_inference.json --lores-width 640 --lores-height 640</code> | <code>rpicam-hello -t 0 --post-process-file ~/rpicam-apps/assets/hailo_yolov6_inference.json --lores-width 640 --lores-height 640</code> | ||
| 第127行: | 第127行: | ||
http://www.mcuzone.com/wiki/0005_MPS2242_2280/0005_MPS2242_2280_43.jpg | http://www.mcuzone.com/wiki/0005_MPS2242_2280/0005_MPS2242_2280_43.jpg | ||
'''<big> | '''<big>You should downloading a large amount of data from the internet out of China to use the testing of this development board, so users can contact our company after buying this development board to obtain a pre-configured Raspberry Pi OS image.</big>''' | ||
== '''五、树莓派系统下使用SSD硬盘''' == | == '''五、树莓派系统下使用SSD硬盘''' == | ||
2024年9月4日 (三) 11:27的版本
关键词
树莓派5、PCIe、驱动安装、操作演示、2230、2242、2280、NVMe SSD、固态硬盘 X1、AI、HAILO 8L、摄像头、OV5647、图像检测、图像识别
一、简介
二、硬件资源
1. 基于树莓派5设计,采用16Pin FPC和树莓派5的PCle接口连接;
2. 扩展板通过PCIe Switch进行一扩二;
3. 一路PCIe扩展M.2 M-key接口,2242尺寸,用于接AI模块 HAilo8,树莓派官方OS加载驱动;
4. 一路PCIe扩展M.2 M-key接口,接NVMe SSD(PCIe X1,仅支持Gen2模式),支持2230/2242/2280尺寸(默认焊接2280铜柱),不支持SATA和NGFF SSD硬盘;
5. SSD可用于存储数据和系统启动;从SSD启动时,需树莓派官方固件是2024.5.13以后的版本;
6. 40Pin GPIO部分采用开窗设计,可通过杜邦线连接,不影响树莓派5自身GPIO引脚使用;
7. PCB板沉金工艺,无铅生产,且通过UL认证,符合ROHS标准,防火等级94V-0;
8. 采用4个M2.5固定孔,和树莓派5定位孔吻合;
9. 可选配铝合金外壳。

三、系统烧写及设置
3.1 概述
本文档采用树莓派OS、Ubuntu系统和OpenWrt系统进行测试。
1) 树莓派OS的版本为2024-07-04-raspios-bookworm-arm64.img.xz,树莓派OS下载地址:
https://www.raspberrypi.com/software/operating-systems/#raspberry-pi-os-64-bit
2) Ubuntu系统的版本为ubuntu-24.04-preinstalled-desktop-arm64+raspi.img.xz,Ubuntu OS下载地址:
https://ubuntu.com/download/raspberry-pi
3) OpenWrt系统版本:
openwrt-bcm27xx-bcm2712-rpi-5-squashfs-sysupgrade-linux-6.1.100-20240805.img.gz
3.2 系统烧写在SD(TF)卡上
3.3 系统烧写在SSD硬盘上
IV. AI (HAILO 8L) usage Demonstration on the Raspberry Pi OS
4.1 Overview
In various practical applications, the demand for camera image detection and recognition is gradually increasing, and there are many AI-based solutions available on the market. The solution demonstrated in this article involves the OV5647 camera, the MPSAI, and the HAILO 8L AI module paired with the Raspberry Pi 5.
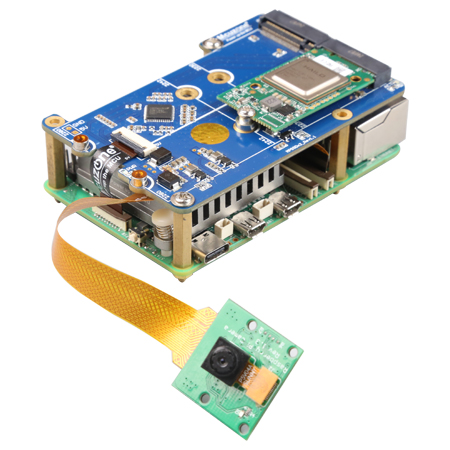
Note: The operation requires a stable internet connection to the regions out of China (you may need to find your own method). Otherwise, many files may not download or may only partially download, which could ultimately lead to the code failing to run.
4.2 Update system
Note: The following operational steps apply whether the system is booted from a TF card or an SSD.
4.2.1 Boot the Raspberry Pi OS and run commands in the terminal:
sudo apt update
sudo apt full-upgrade
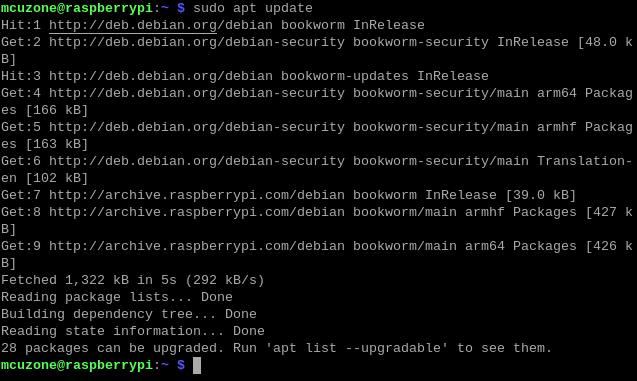
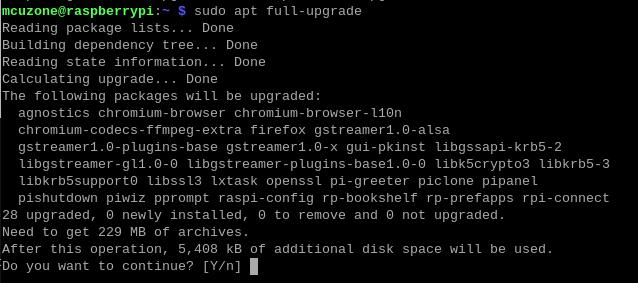
4.2.2 Run sudo rpi-eeprom-updateto check the Raspberry Pi firmware and ensure that the firmware date is after December 6, 2023:

As shown in the above figure, the firmware date is June 5, 2024.
4.2.3 Run sudo raspi-config ,select the corresponding options in sequence according to the following diagram:

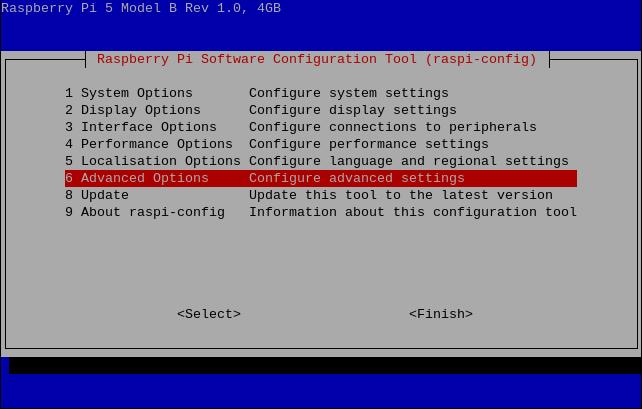
After making your selection and exiting, the system will automatically restart. If it does not restart automatically, please manually execute sudo reboot to restart the system.
4.3 Install the depends required for the AI module
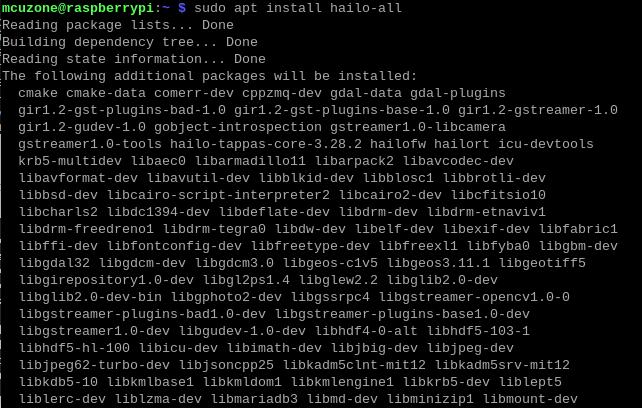
Run sudo apt install hailo-all, install the depends required for the AI module:
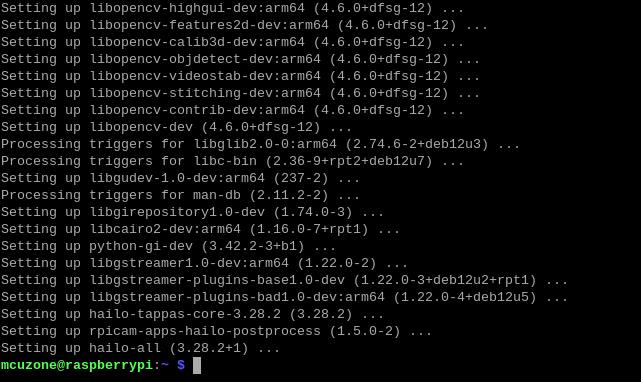
After completing this, execute sudo reboot to restart the system and apply these settings.
Run hailortcli fw-control identify, If the following output appears, it indicates that the depends for HAILO 8L have been successfully installed:

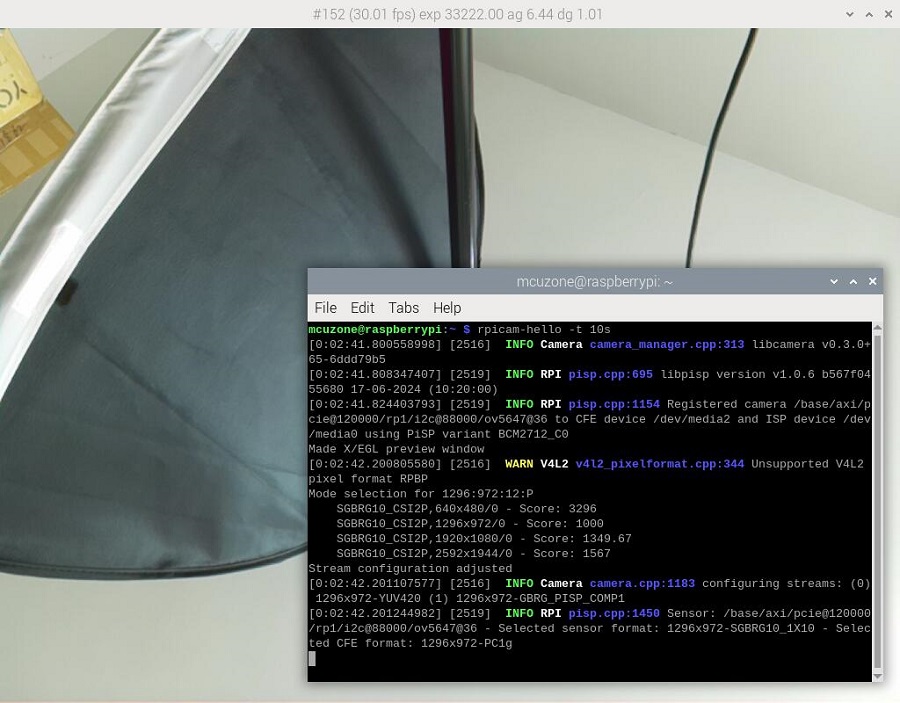
Finally, execute rpicam-hello -t 10s to turn on the camera and bring up the preview window, ensuring that the camera is functioning normally.
4.4 Image recognition and detection
Run:
git clone --depth 1 https://github.com/raspberrypi/rpicam-apps.git ~/rpicam-apps
Clone the library of rpicam-apps:

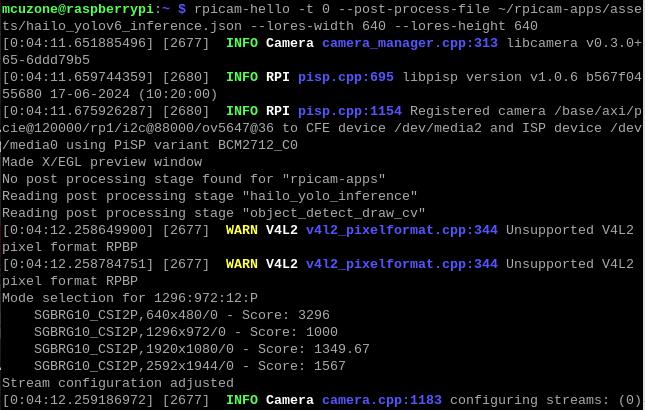
After cloning is completed, you can begin image recognition and detection:
rpicam-hello -t 0 --post-process-file ~/rpicam-apps/assets/hailo_yolov6_inference.json --lores-width 640 --lores-height 640
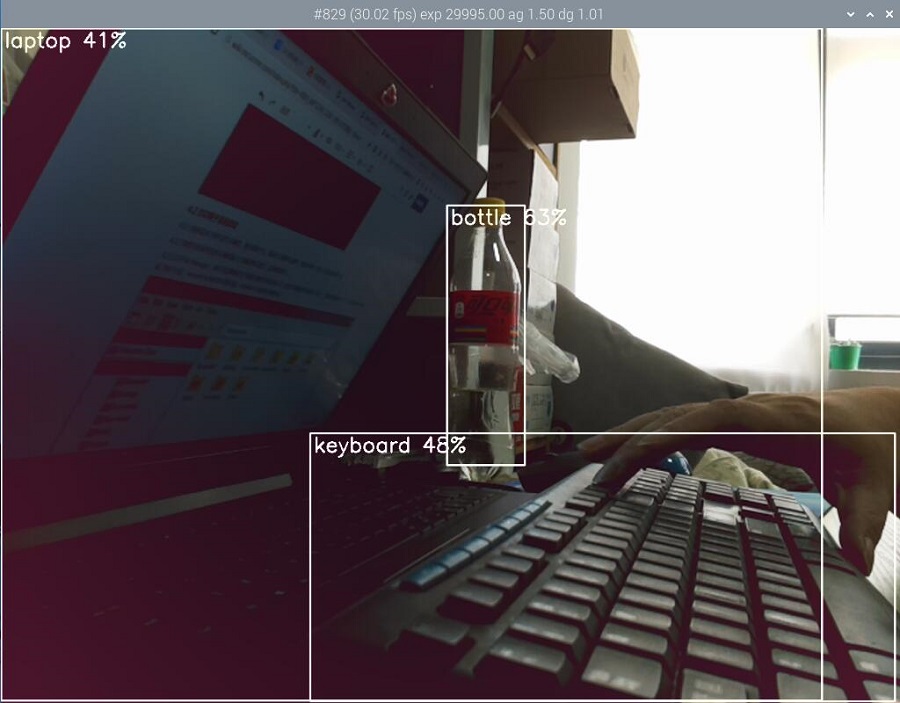
You should downloading a large amount of data from the internet out of China to use the testing of this development board, so users can contact our company after buying this development board to obtain a pre-configured Raspberry Pi OS image.
五、树莓派系统下使用SSD硬盘
关于对SSD硬盘的基本操作,我们可以参考以下链接:
关于如何测试SSD硬盘,我们可以参考以下链接:
六、Ubuntu系统下使用SSD硬盘
关于对SSD硬盘的基本操作,我们可以参考以下链接,除了SSD用作存储扩展中与树莓派OS下操作略有不同,其余部分基本相同:
关于如何测试SSD硬盘,我们可以参考以下链接:
七、OpenWrt系统下使用SSD硬盘
关于如何在OpenWrt系统下使用SSD硬盘,我们可以参考以下链接:
联系我们
电话:13957118045
如本页面有任何疏漏、错误或者侵权,请通过上述途径联系我们,谢谢!
Copyright 2004-2025 野芯科技


 QQ:8204136